How To Setup Firebase and React Project
Sep 2023 · 6 min
Learn to set up a React project with Firebase, covering authentication and Firestore integration in this comprehensive guide.
.png&w=3840&q=75)
Overview
In this blog, we will see how to set up a React project with Firebase project, including Firebase authentication and Firestore setup. By the end of this tutorial, you'll be well-equipped to create a React web application that incorporates essential Firebase features.
React Project Setup
First of all, we will create a React project using Vite. Vite offers a fast hot module reload, which accelerates our development process.
To create an app using Vite, run this command:
yarn create vite
// or with npm
npm create vite@latest
It will ask the details in steps as following
- Project name → for that we will name this project react-firebase-authentication-guide

- Project template → for template/framework we will choose React
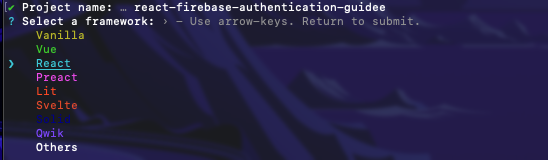
- Project language → and finally we will select javascript as the language for this project

- After creating the project, the final steps are to go into the folder by using cd command
- After that, install the dependencies using yarn or npm install

After this, we will install Firebase using the following command.
yarn add firebase
Along with Firebase, we also need to install another dependency called react-router-dom for handling route navigation between public and private routes. You can install it by running the following command:
yarn add react-router-dom
And finally, we will start our project using the following command. Make sure you run this command in your project directory.
yarn dev
// or
npm run dev
It will start our project at port http://127.0.0.1:5173/
If you want to use localhot:3000, then you can update the vite.config.js file like this.
vite.config.js
import { defineConfig } from "vite";
import react from "@vitejs/plugin-react";
// https://vitejs.dev/config/
export default defineConfig({
plugins: [react()],
server: {
port: 3000,
},
});
After setting up our react project, now it’s time to create our firebase project.
Firebase Project setup
To begin, you need to access the Firebase console by visiting the following URL: https://console.firebase.google.com. Once you're there, follow these steps:
- Click on "Add Project" to create a new project.
- Provide a name for your project.
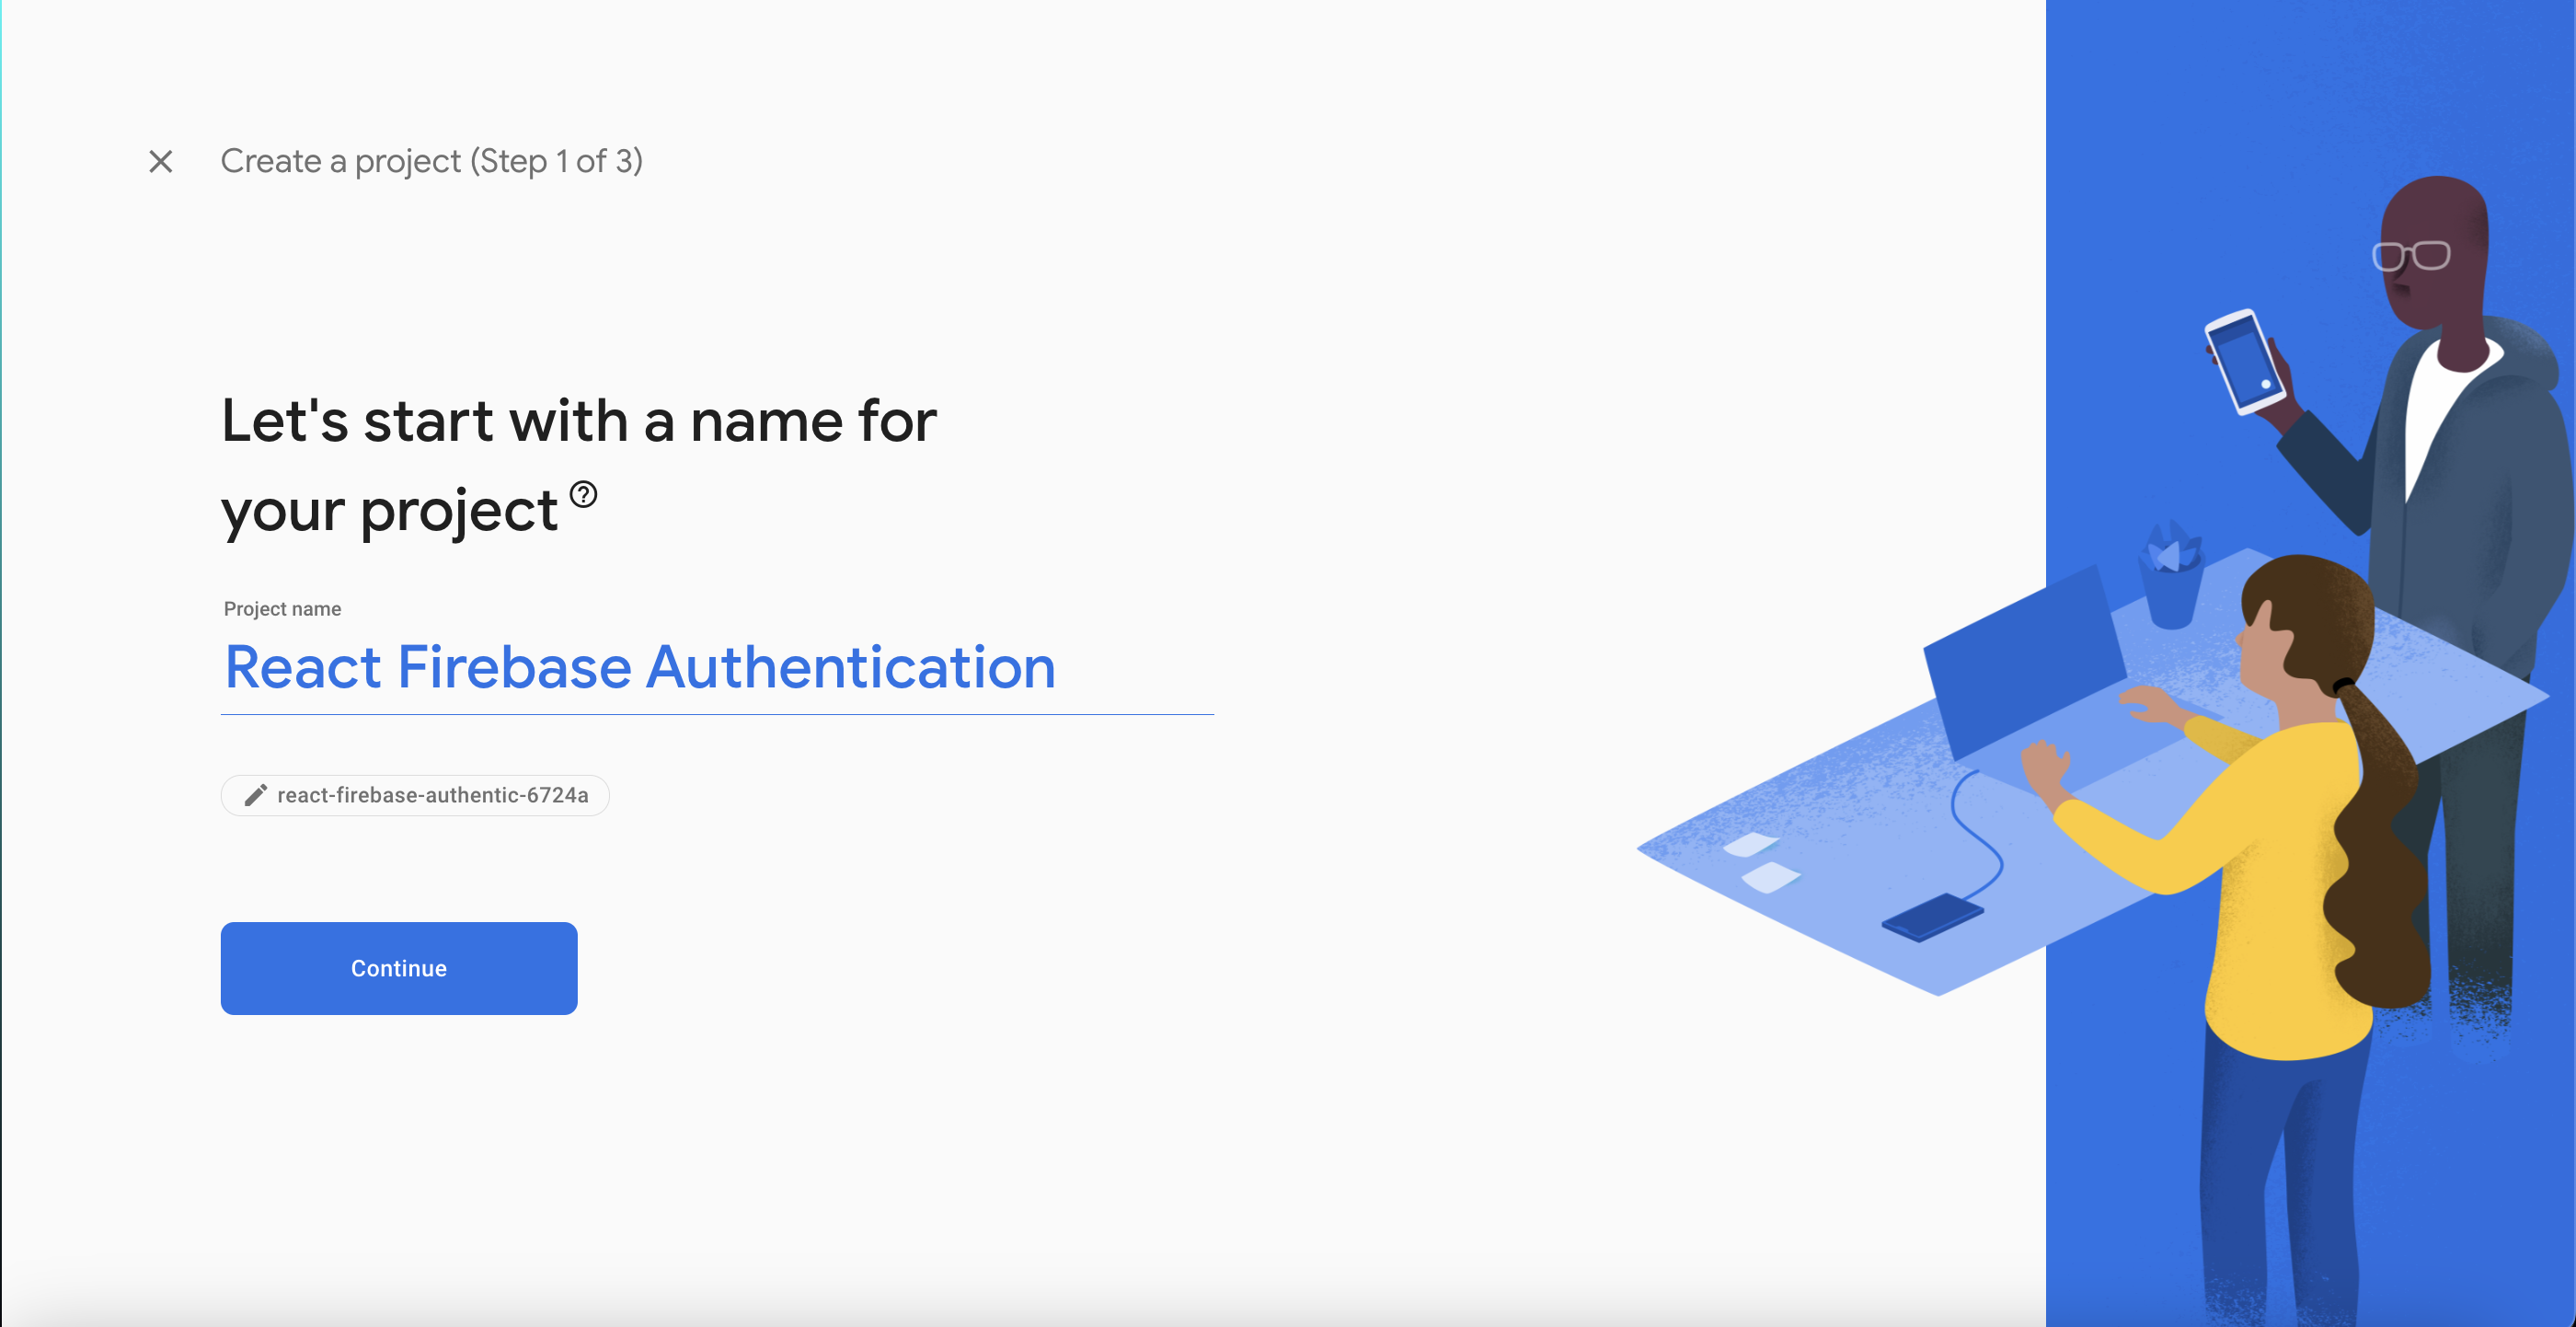
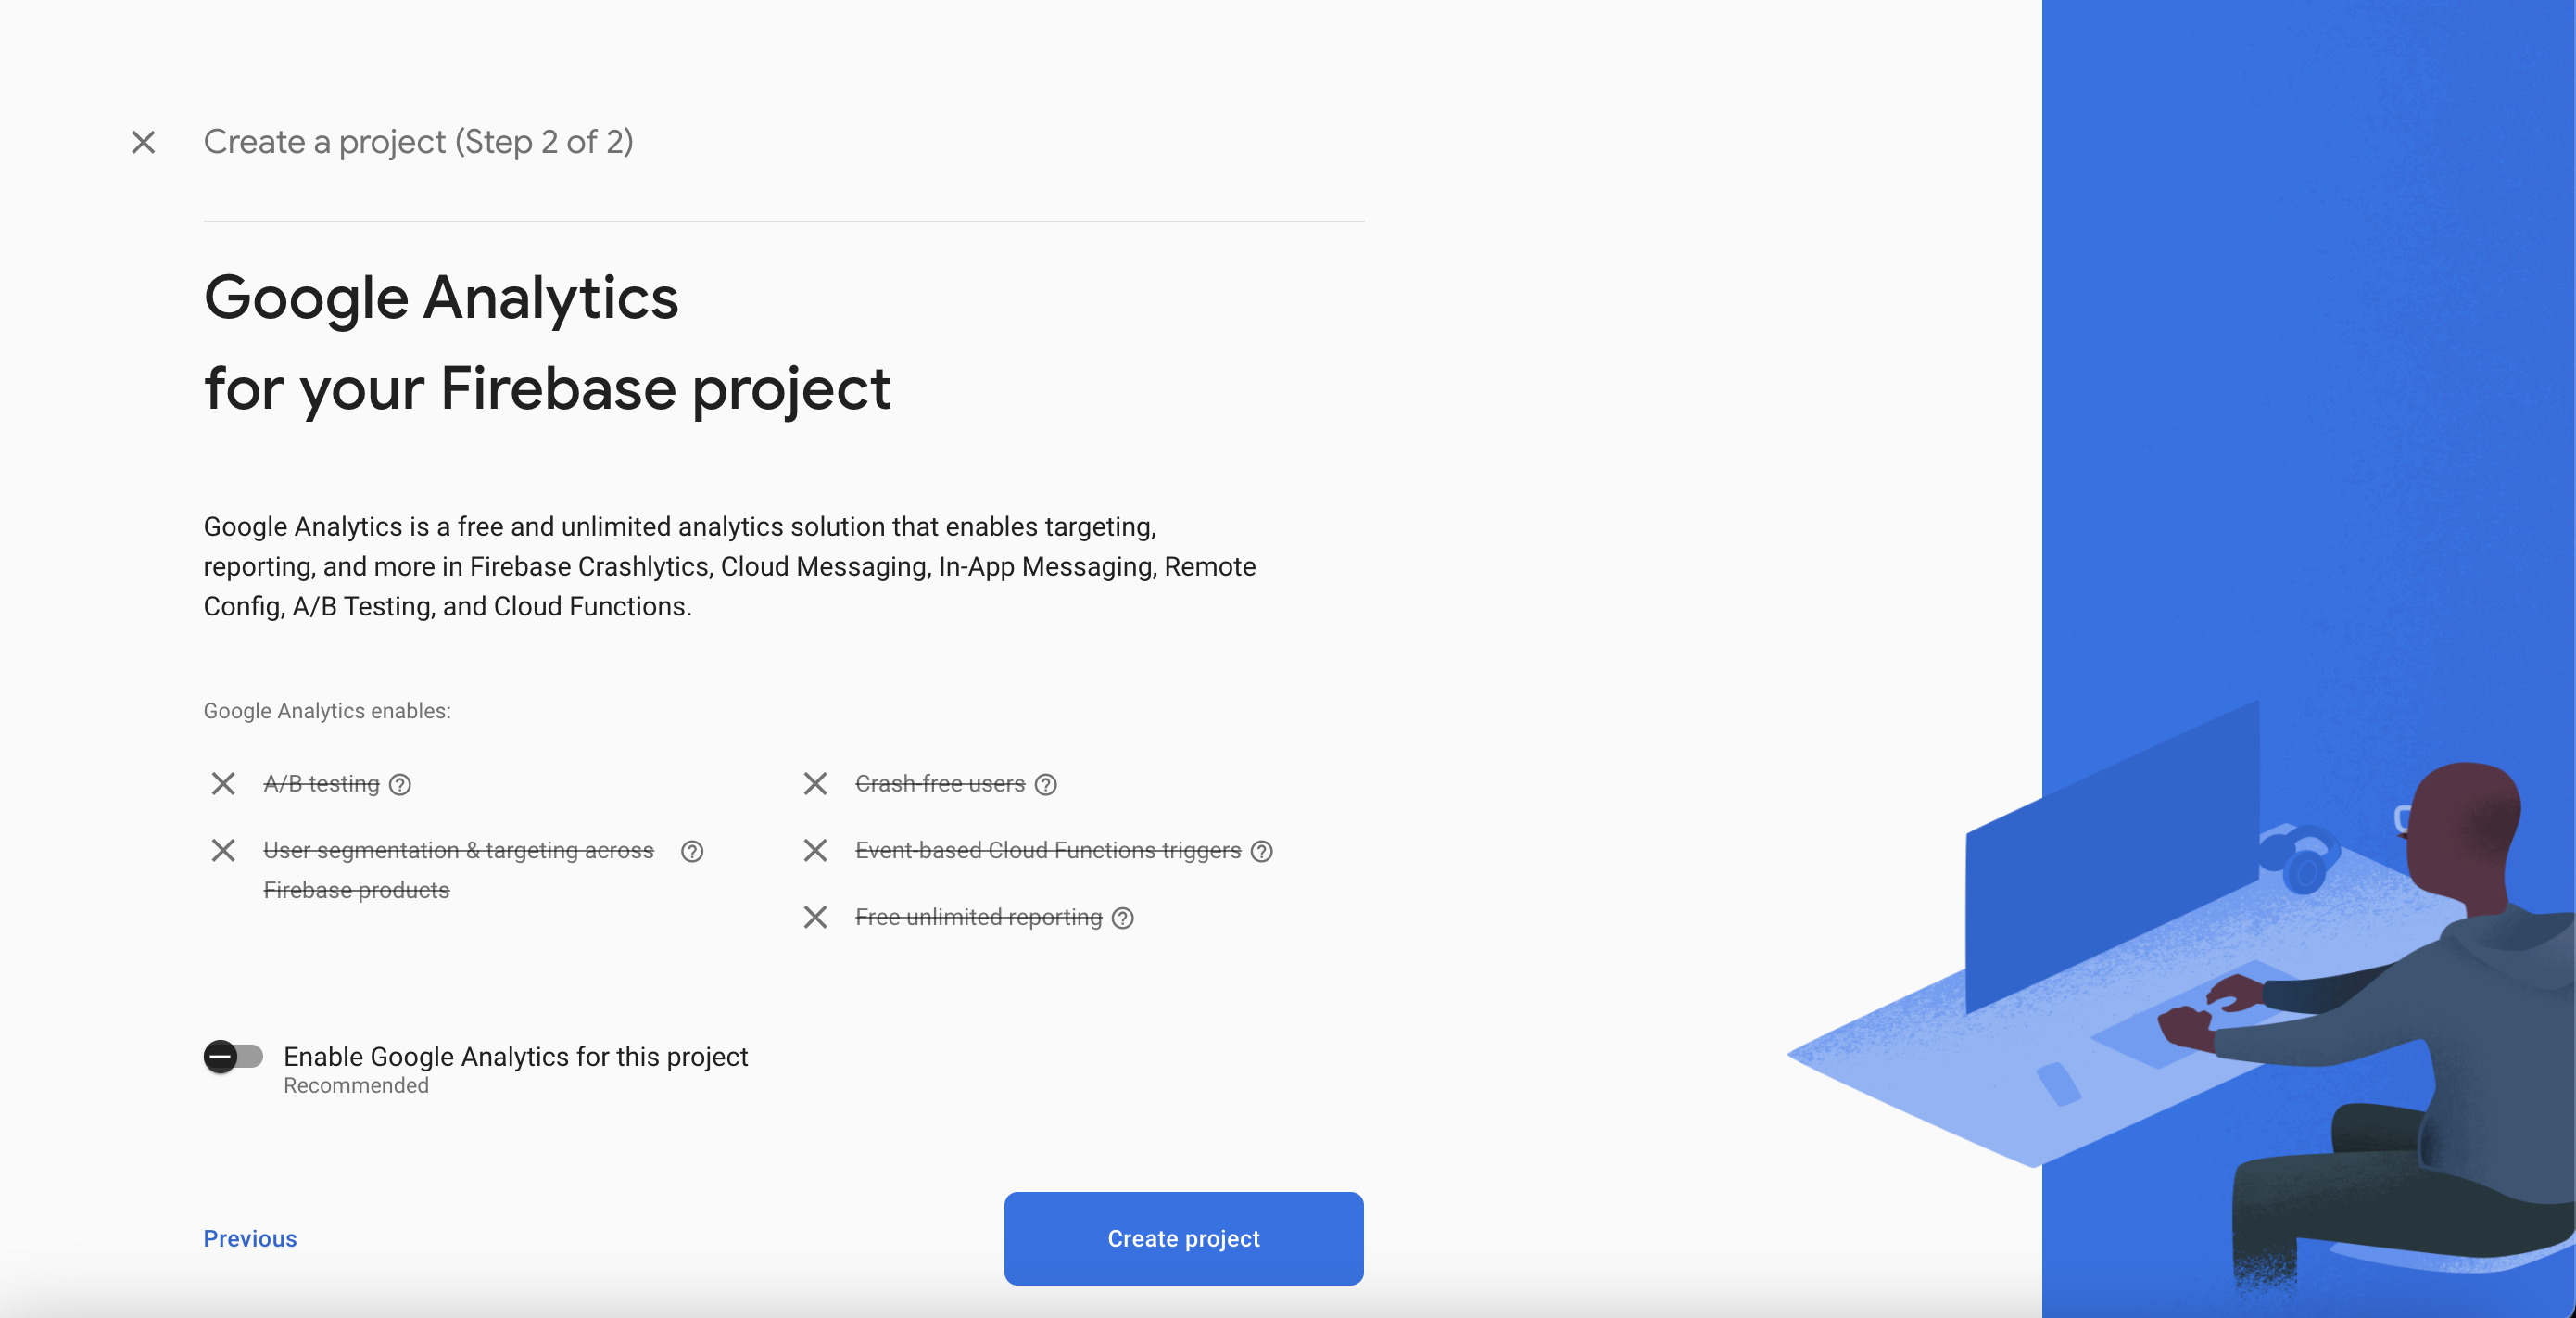
Afterward, ensure that analytics is turned off by selecting the corresponding option. Then, click on "Create Project" and patiently wait for a moment. Once the project is successfully created, you will be redirected to the Firebase project console.
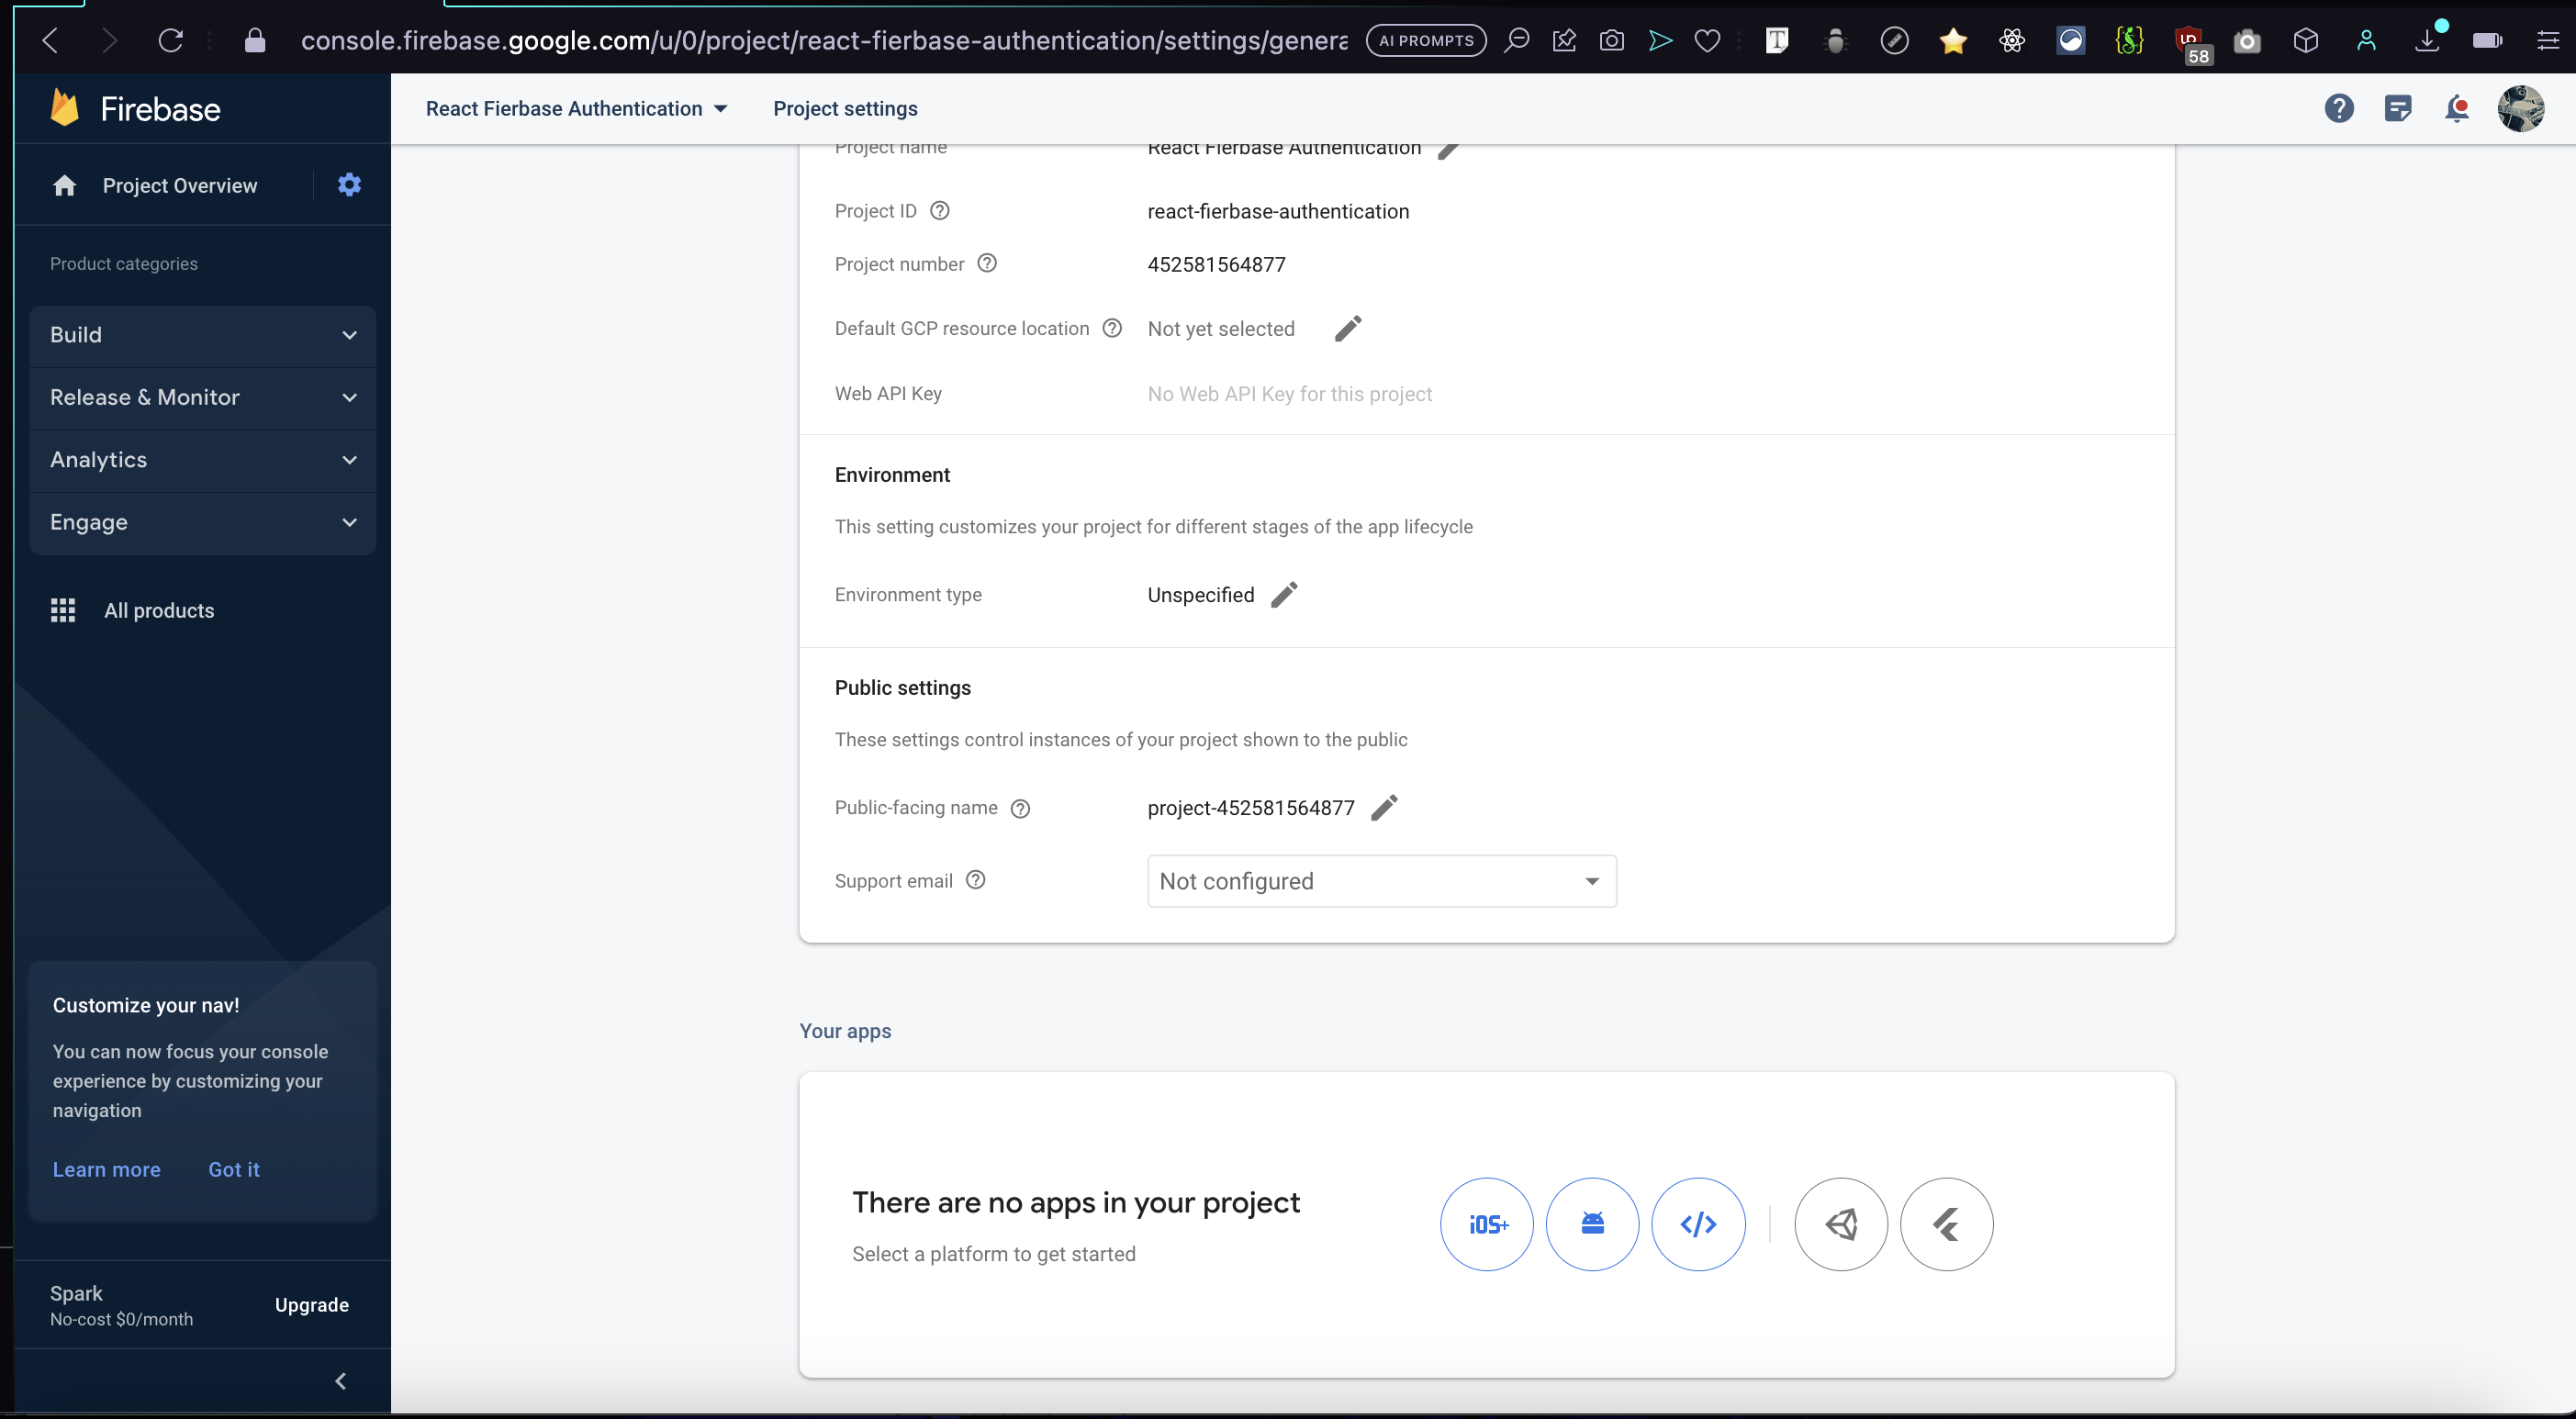
Next, navigate to the project settings by locating and clicking on the settings gear icon located in the top left section, as illustrated below.
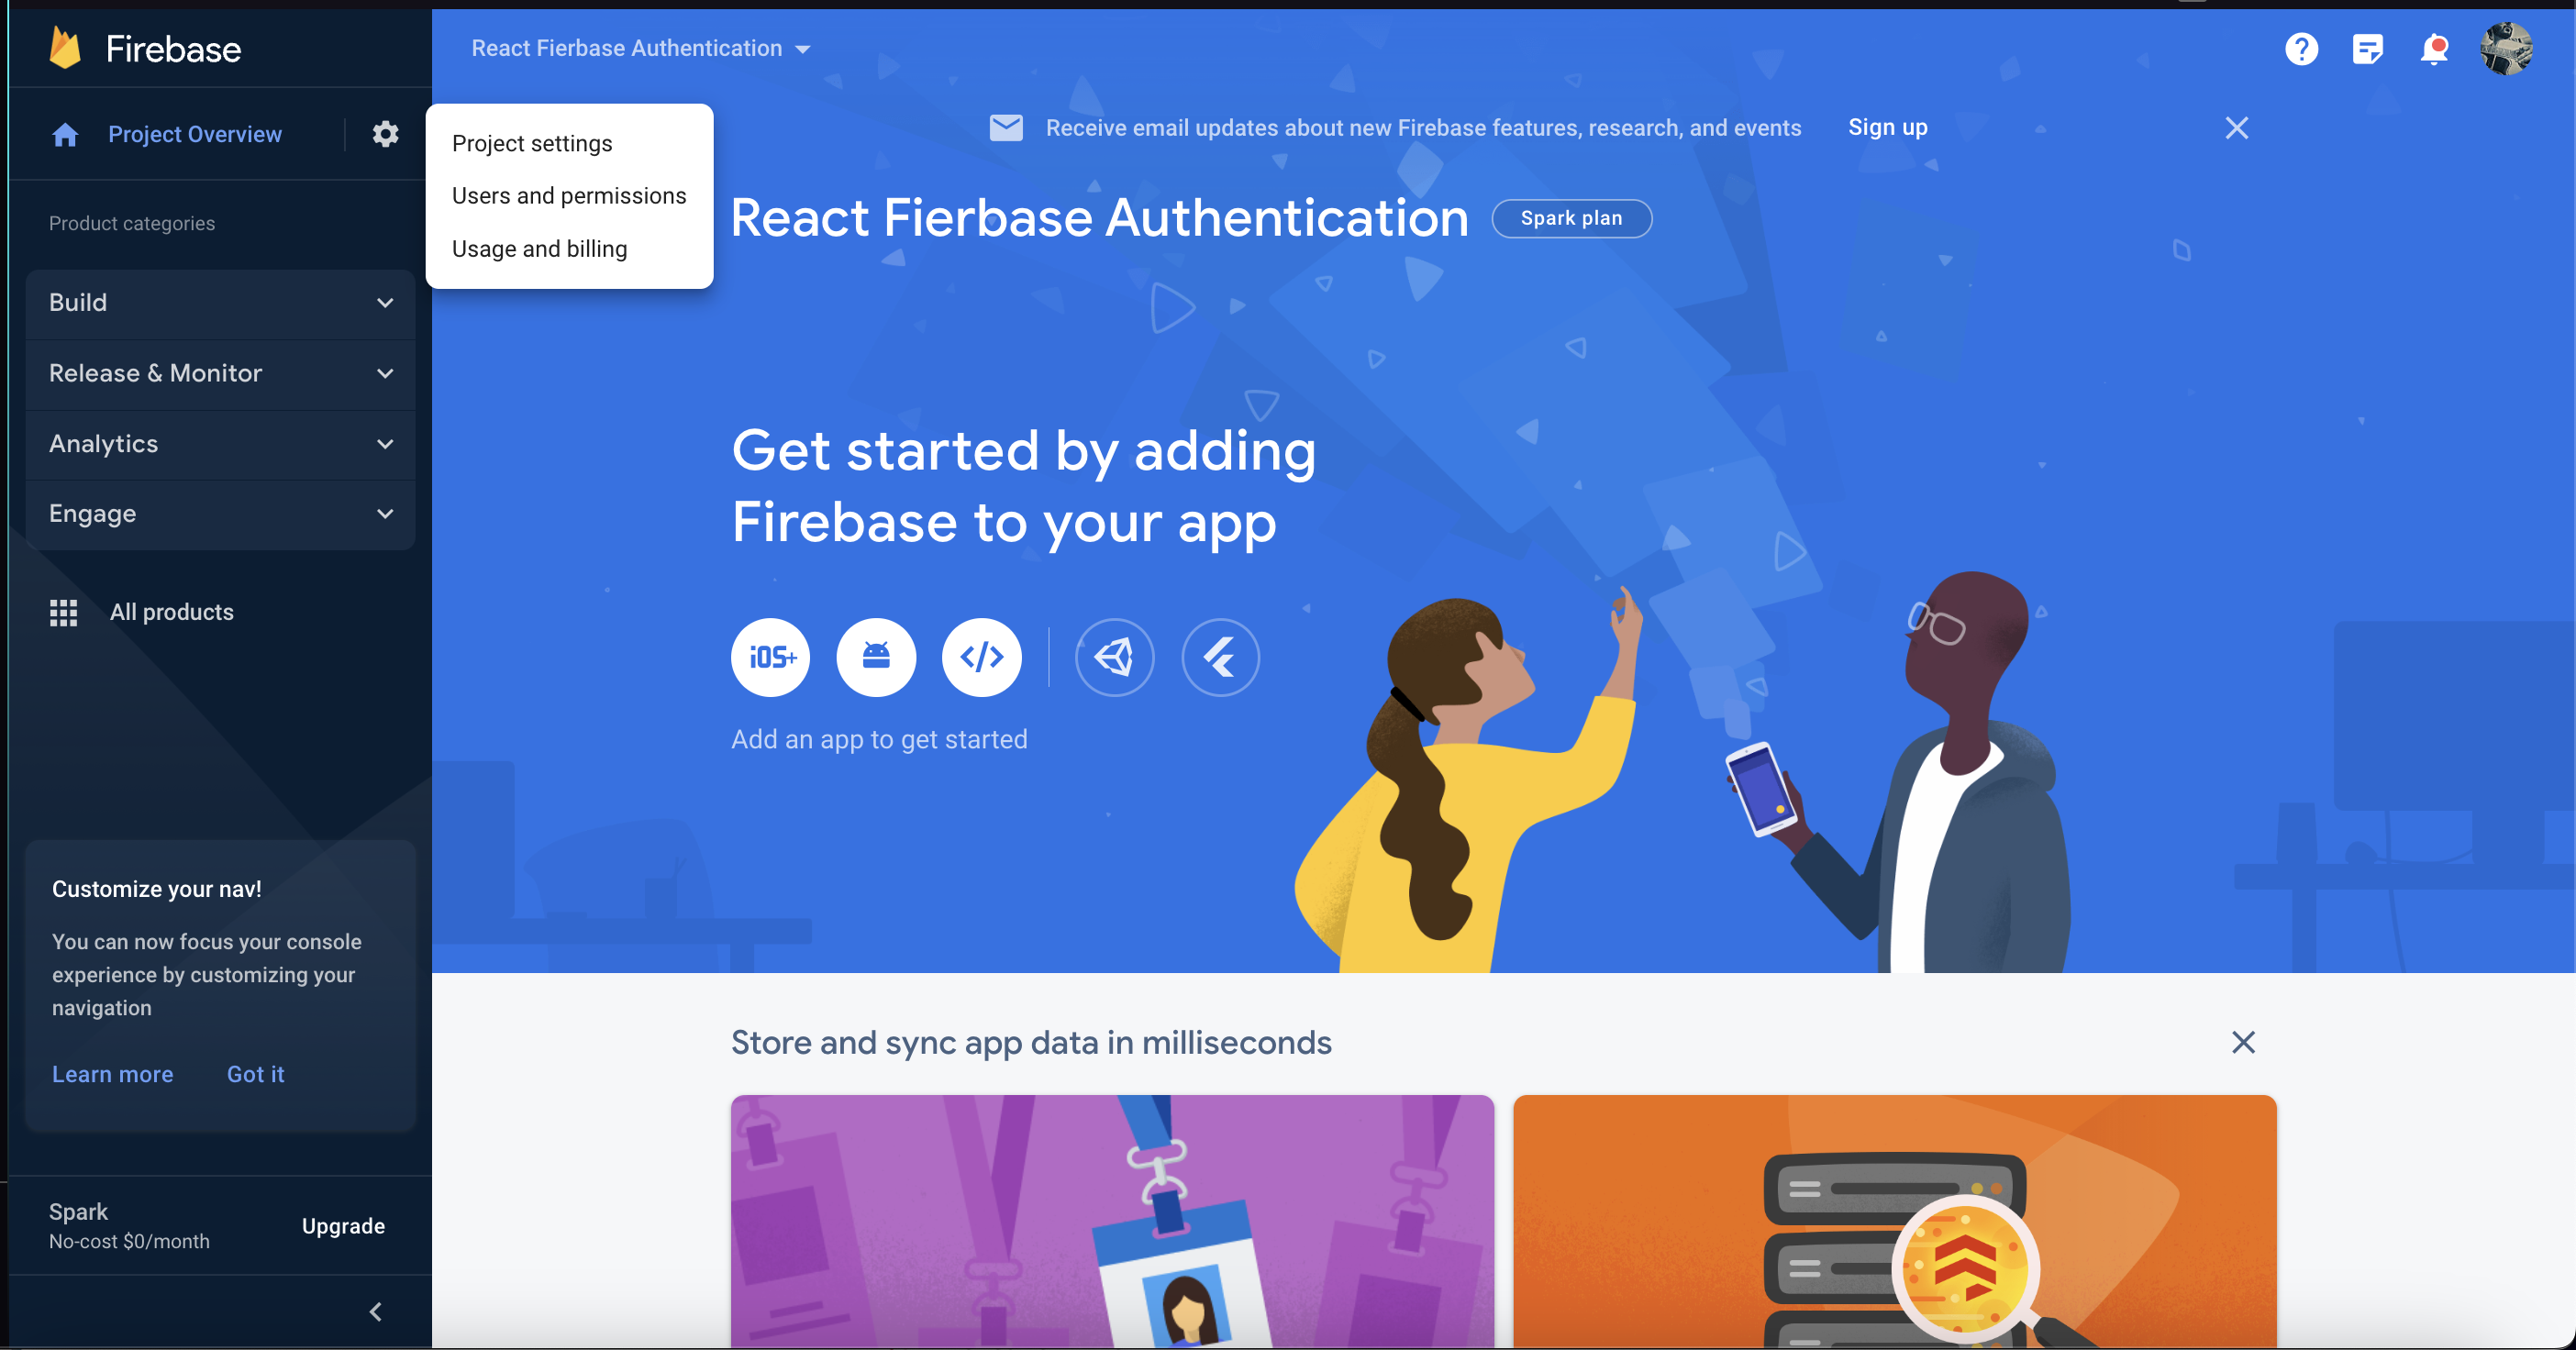
Once you have accessed the project settings, you will encounter a screen resembling the following. Your next step is to add a web app using Firebase. To proceed, click on the icon resembling brackets, which represents the option for adding a web app.
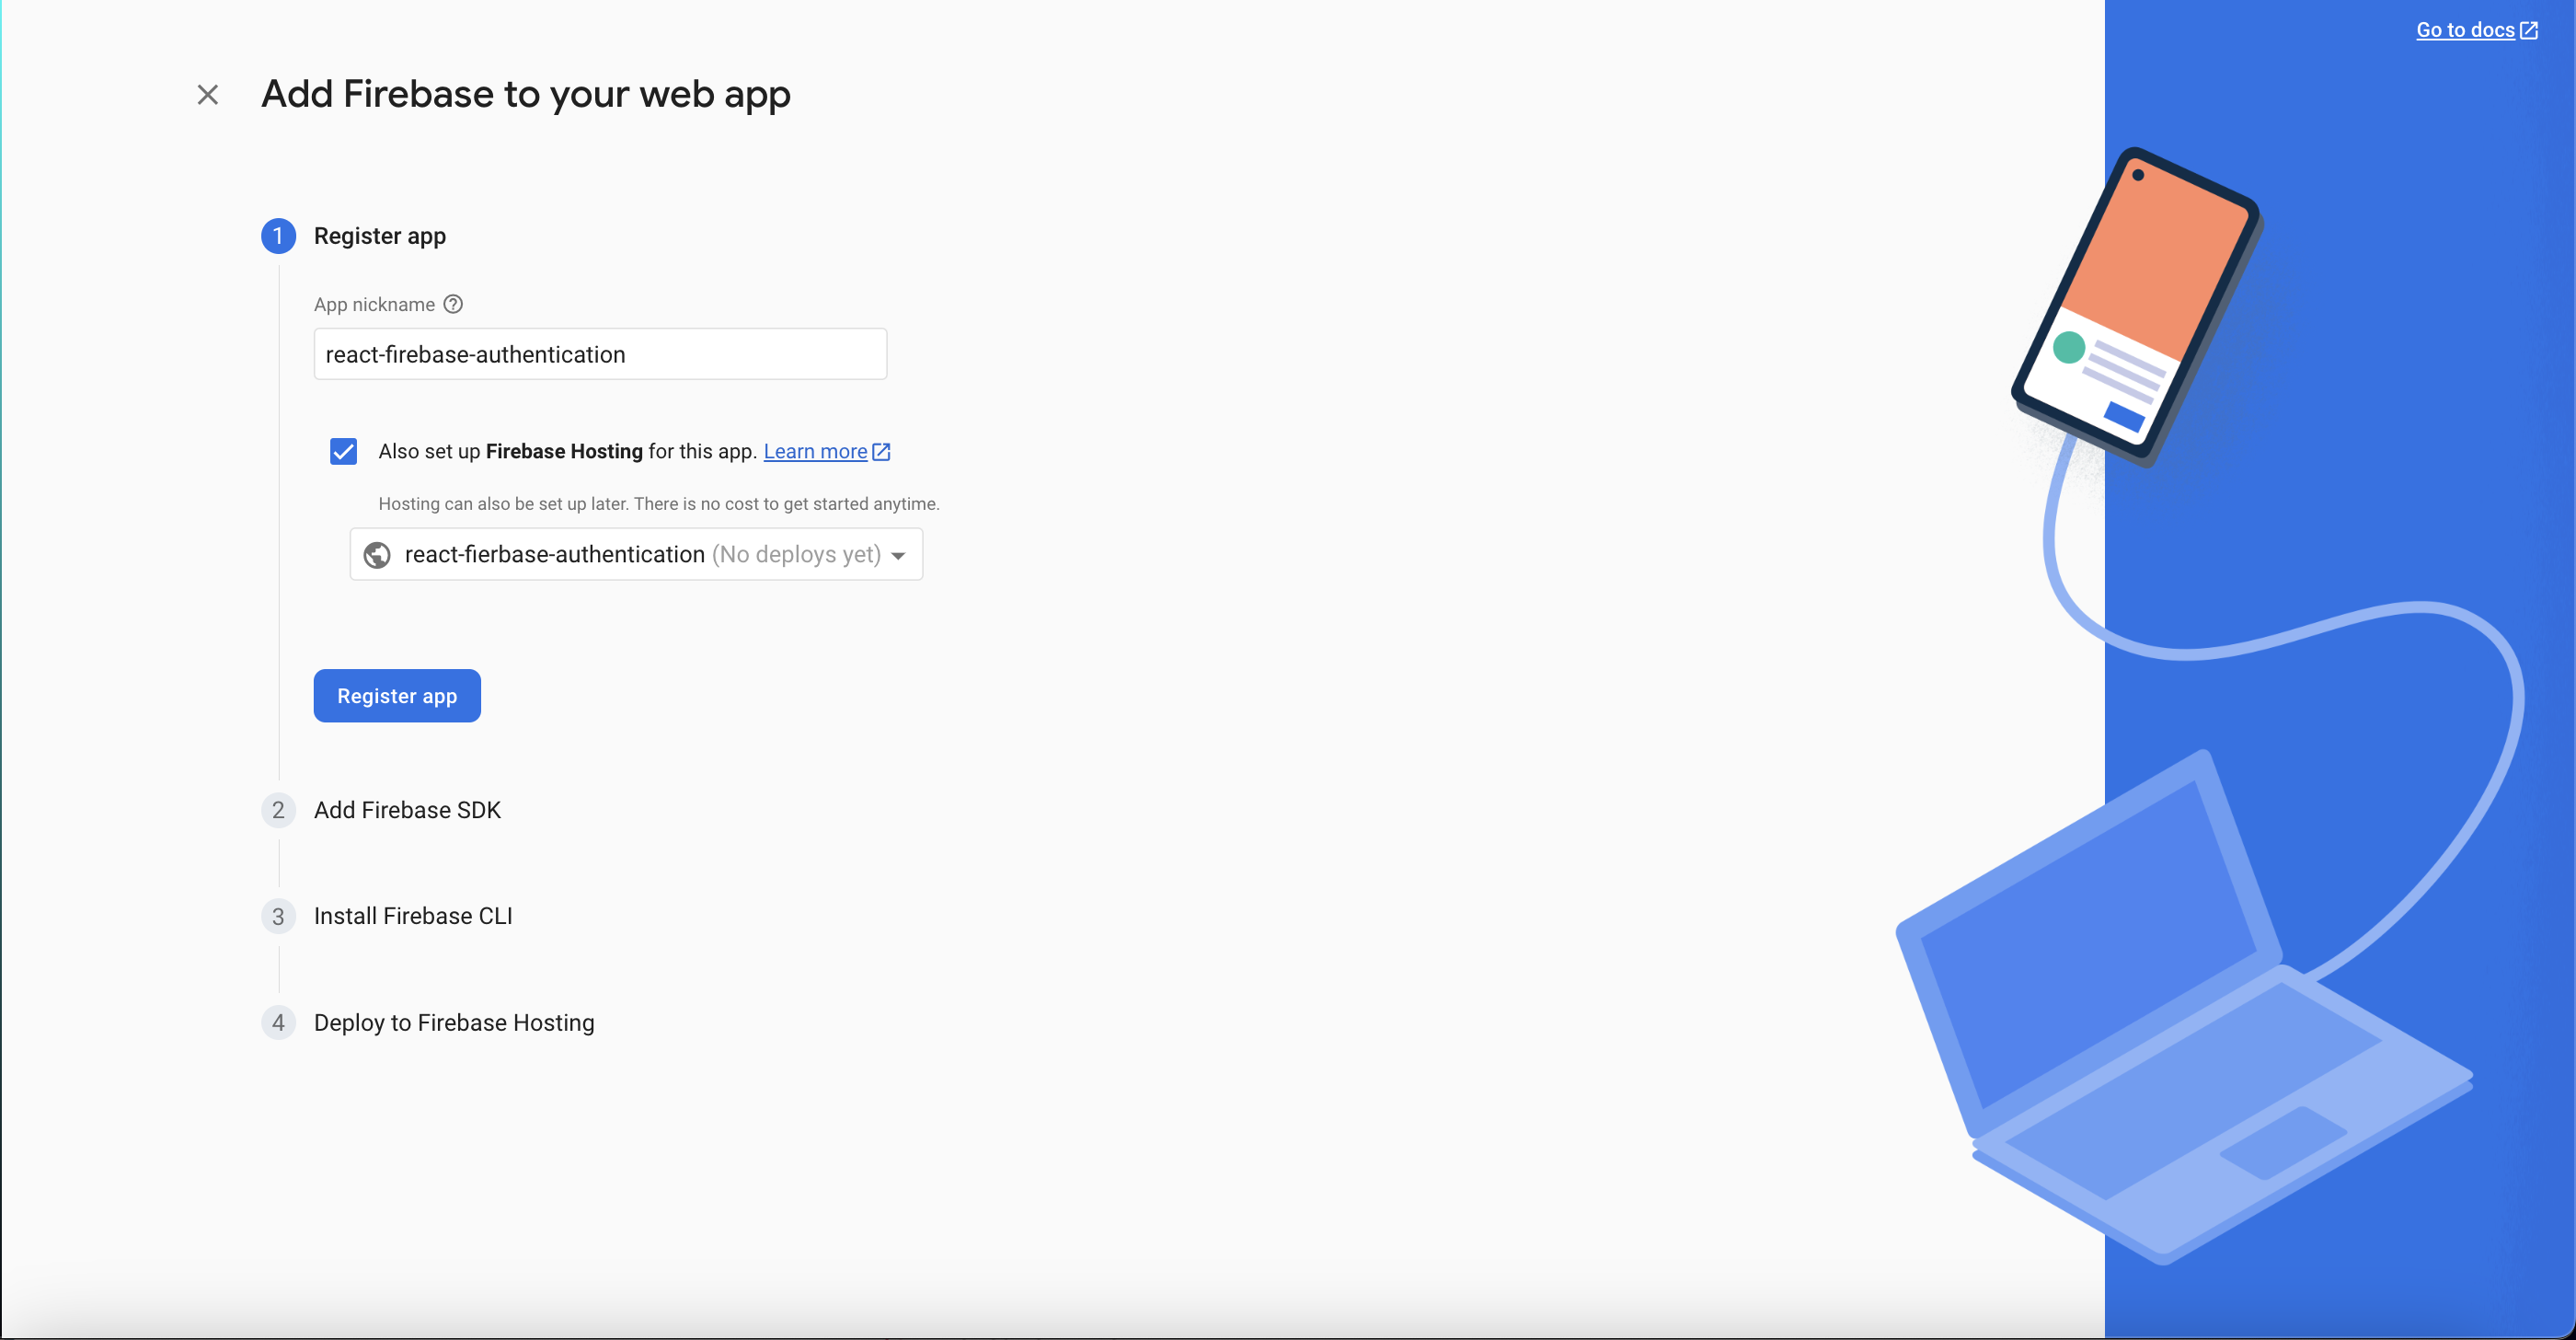
After selecting the web app option, provide a suitable name for your web app in the designated field, as shown below. Once you've named your web app, click on "Register App" to proceed.
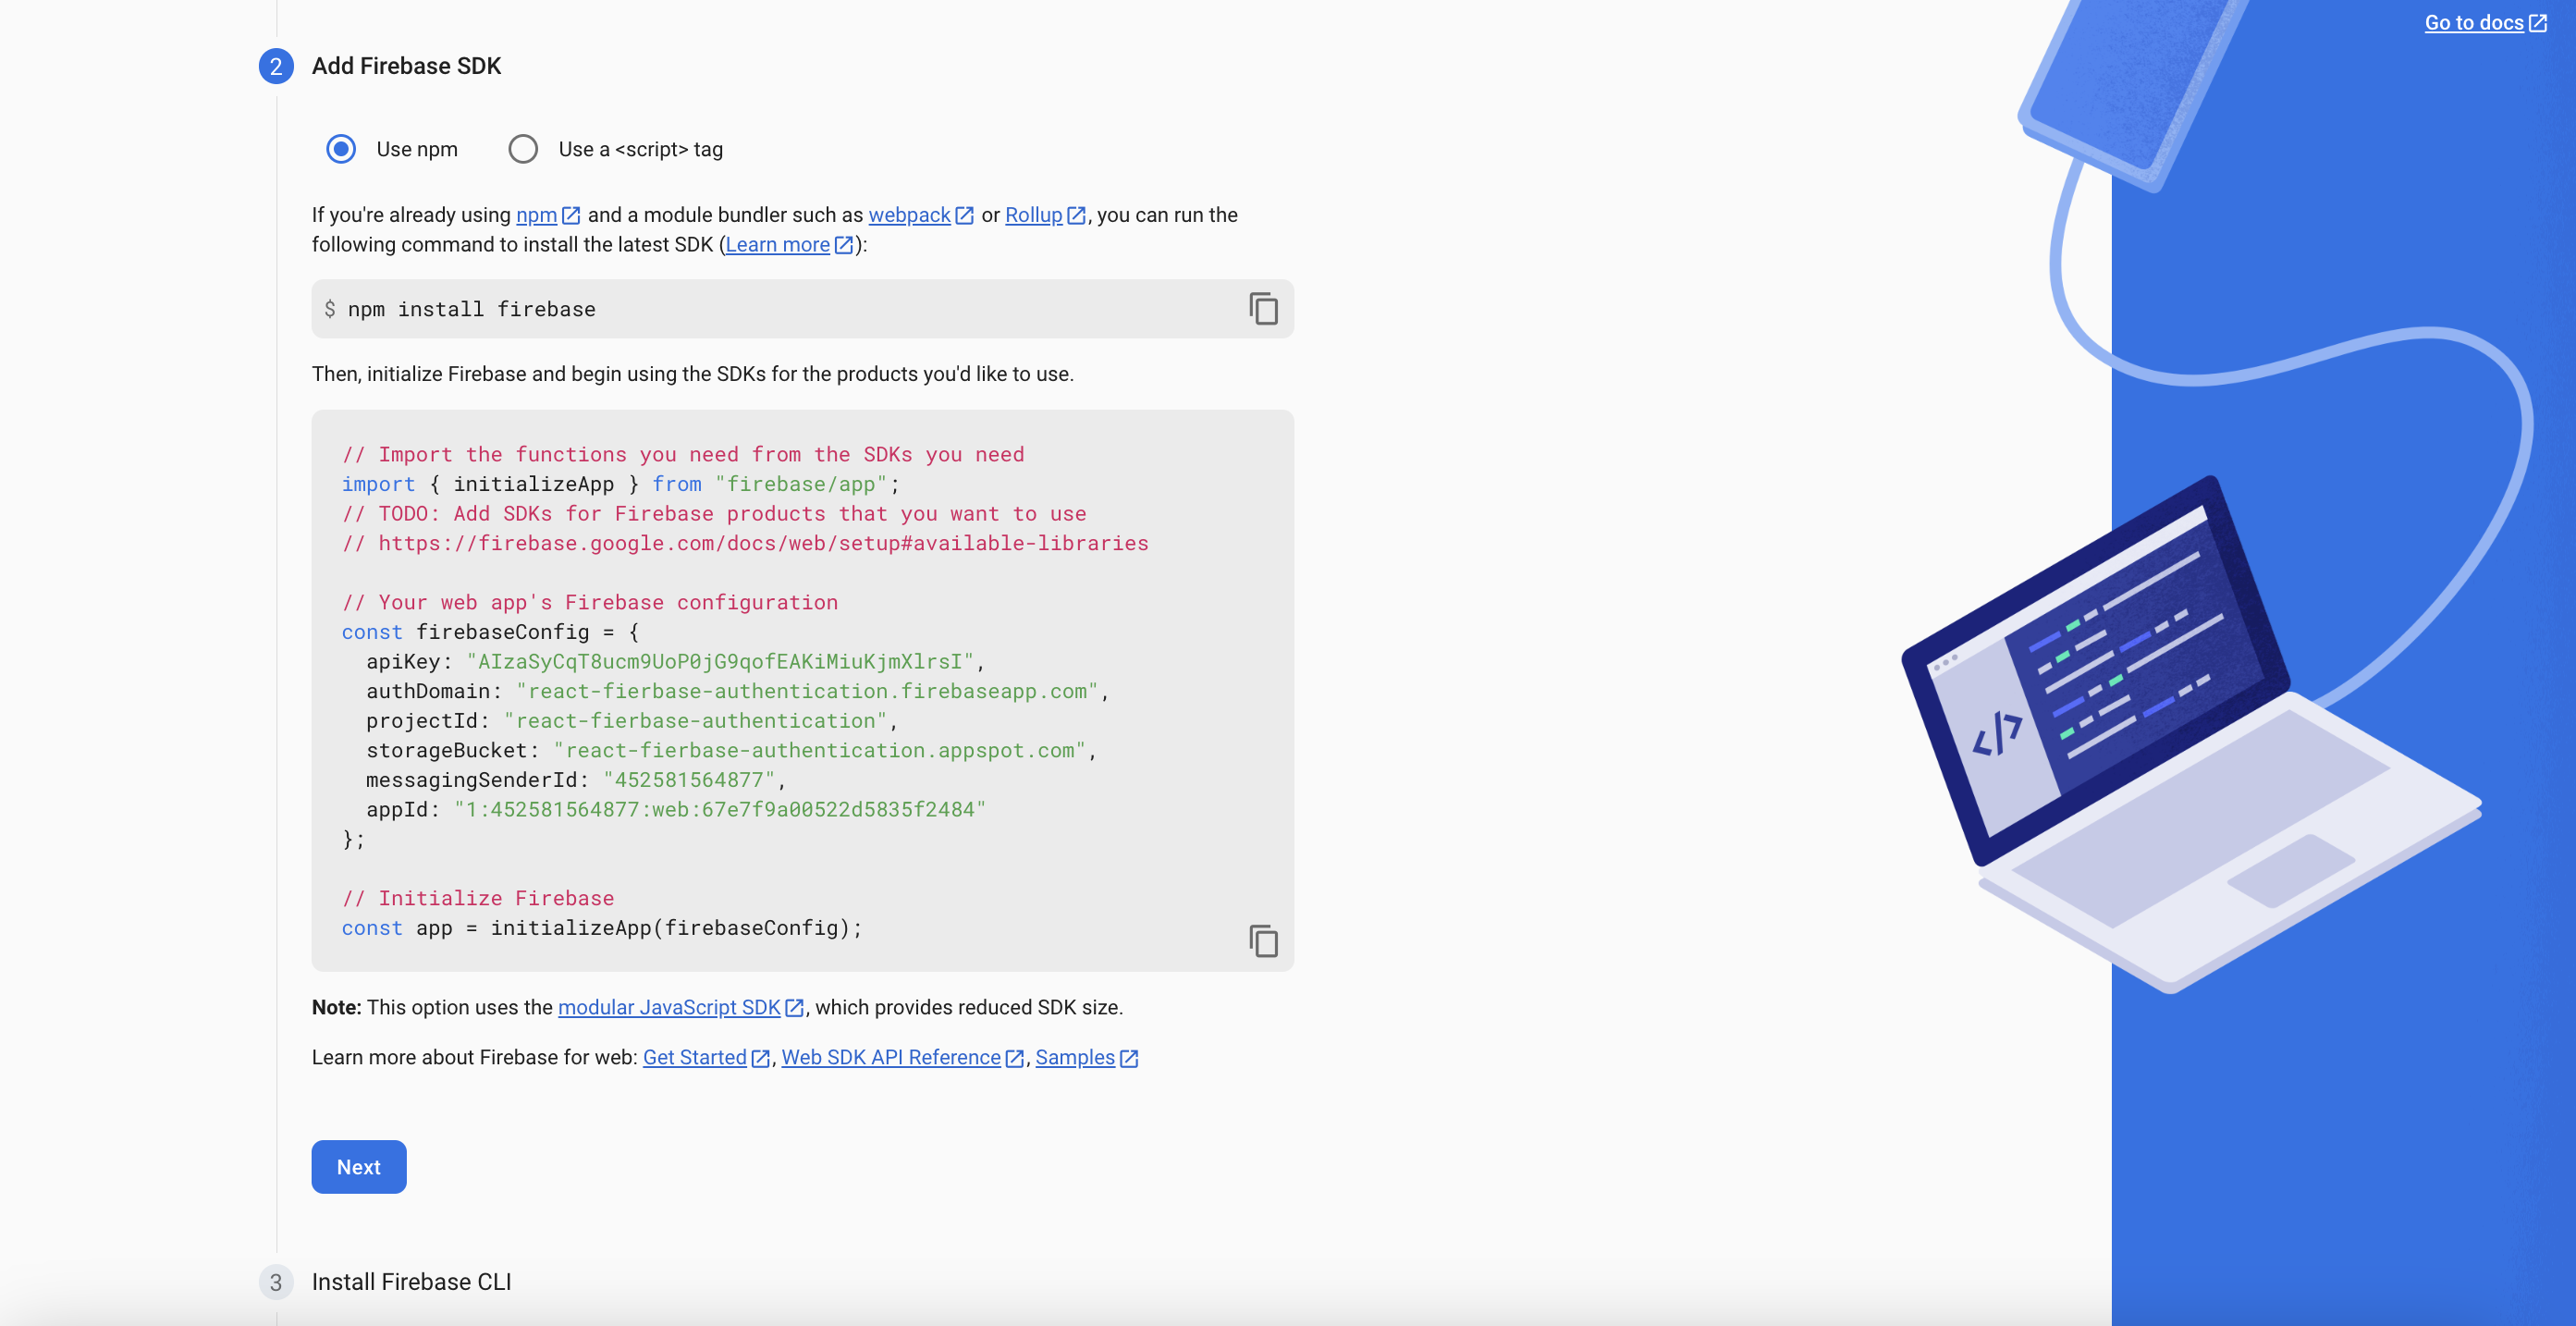
Upon clicking "Register App," you will be presented with the Firebase installation guide. However, since you have already installed Firebase, you can skip this step. Instead, you should focus on copying the Firebase configuration settings, as demonstrated below. Once you have copied the configuration settings, click on "Next" to proceed.
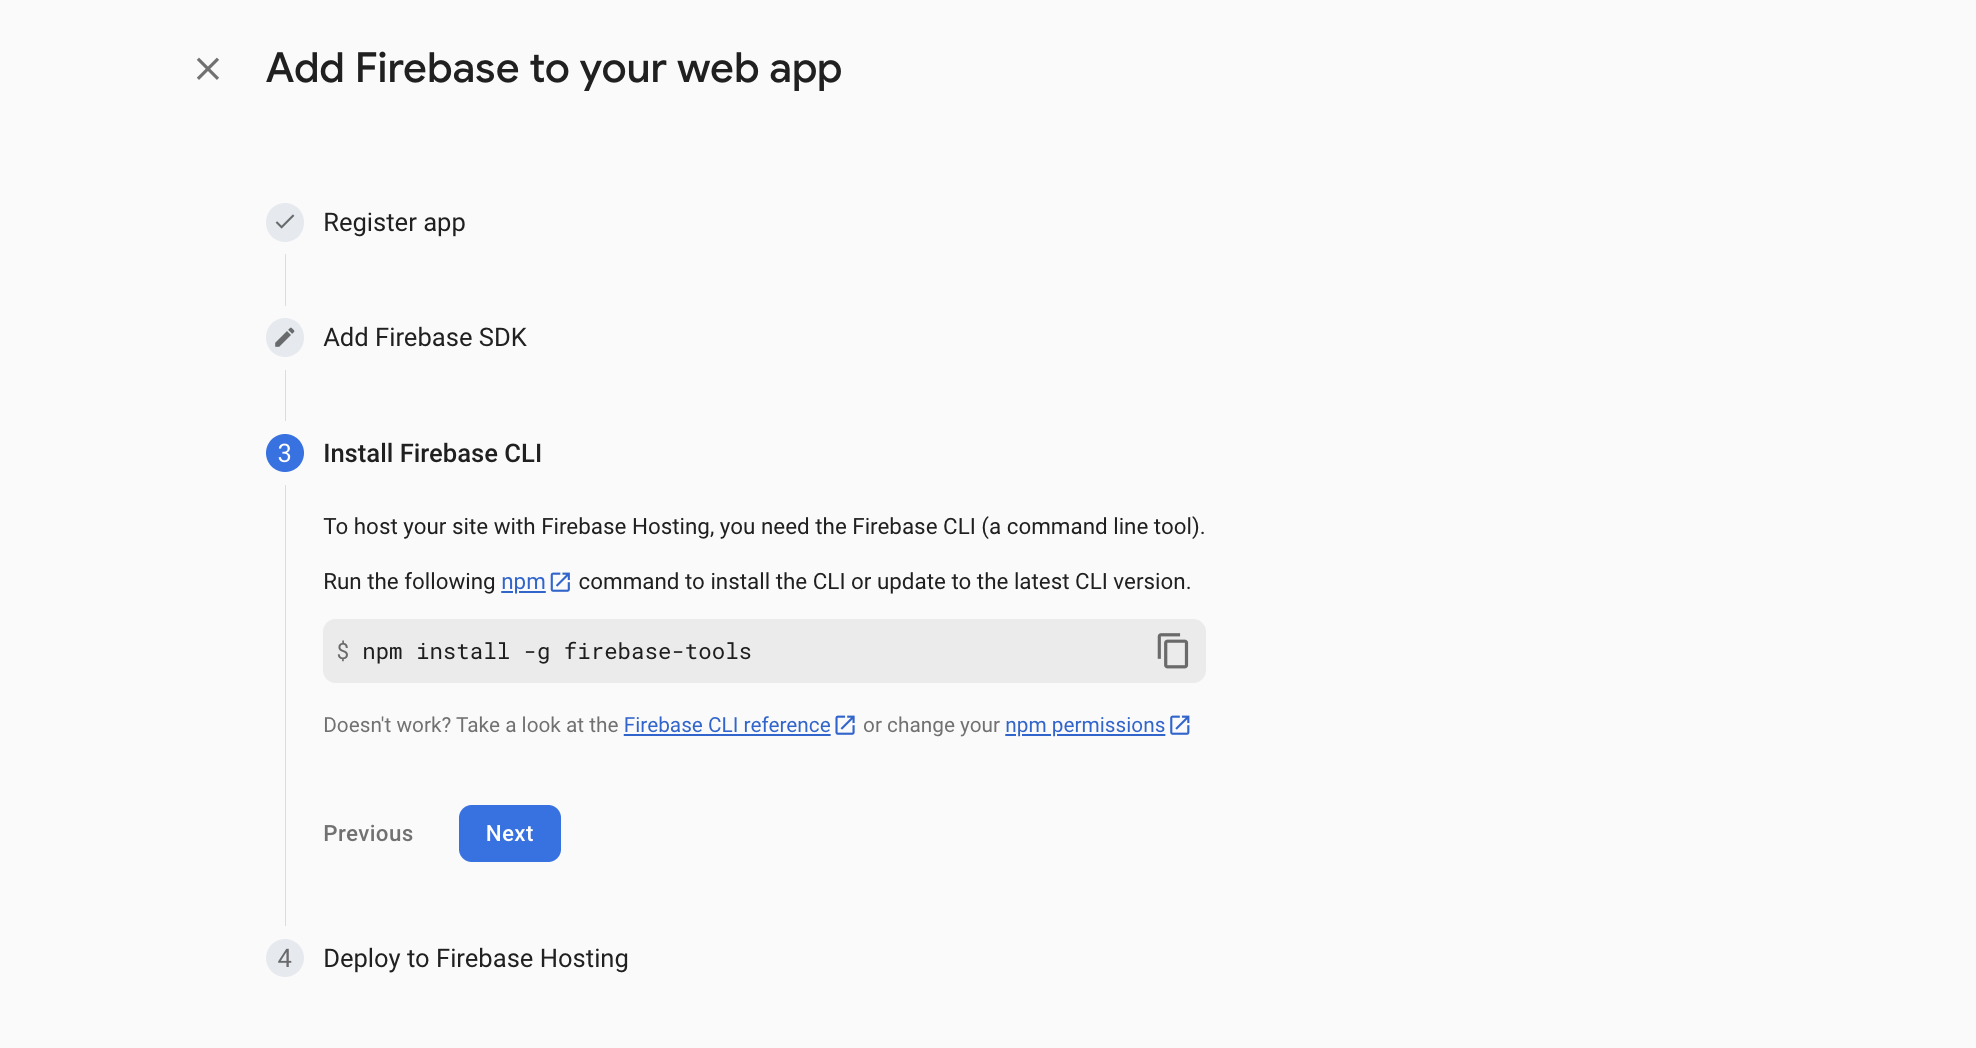
After clicking "Next," you will have the option to install Firebase tools if you haven't done so already. You can proceed with this installation by following the provided instructions. Once you have completed the installation, click on "Next" and then click on "Go to the console" to proceed.
Firebase Authentication setup
After completing the setup of your web app with Firebase, it's time to enable authentication for your project. Follow these steps:
- Click on the "Build" tab.
- In the left sidebar, locate and click on "Authentication."
On the Authentication tab, you will find a "Get Started" button. Click on it to proceed.

After clicking on the "Get Started" button, you will be presented with various authentication options. Select the "Email and Password" option from the available choices.
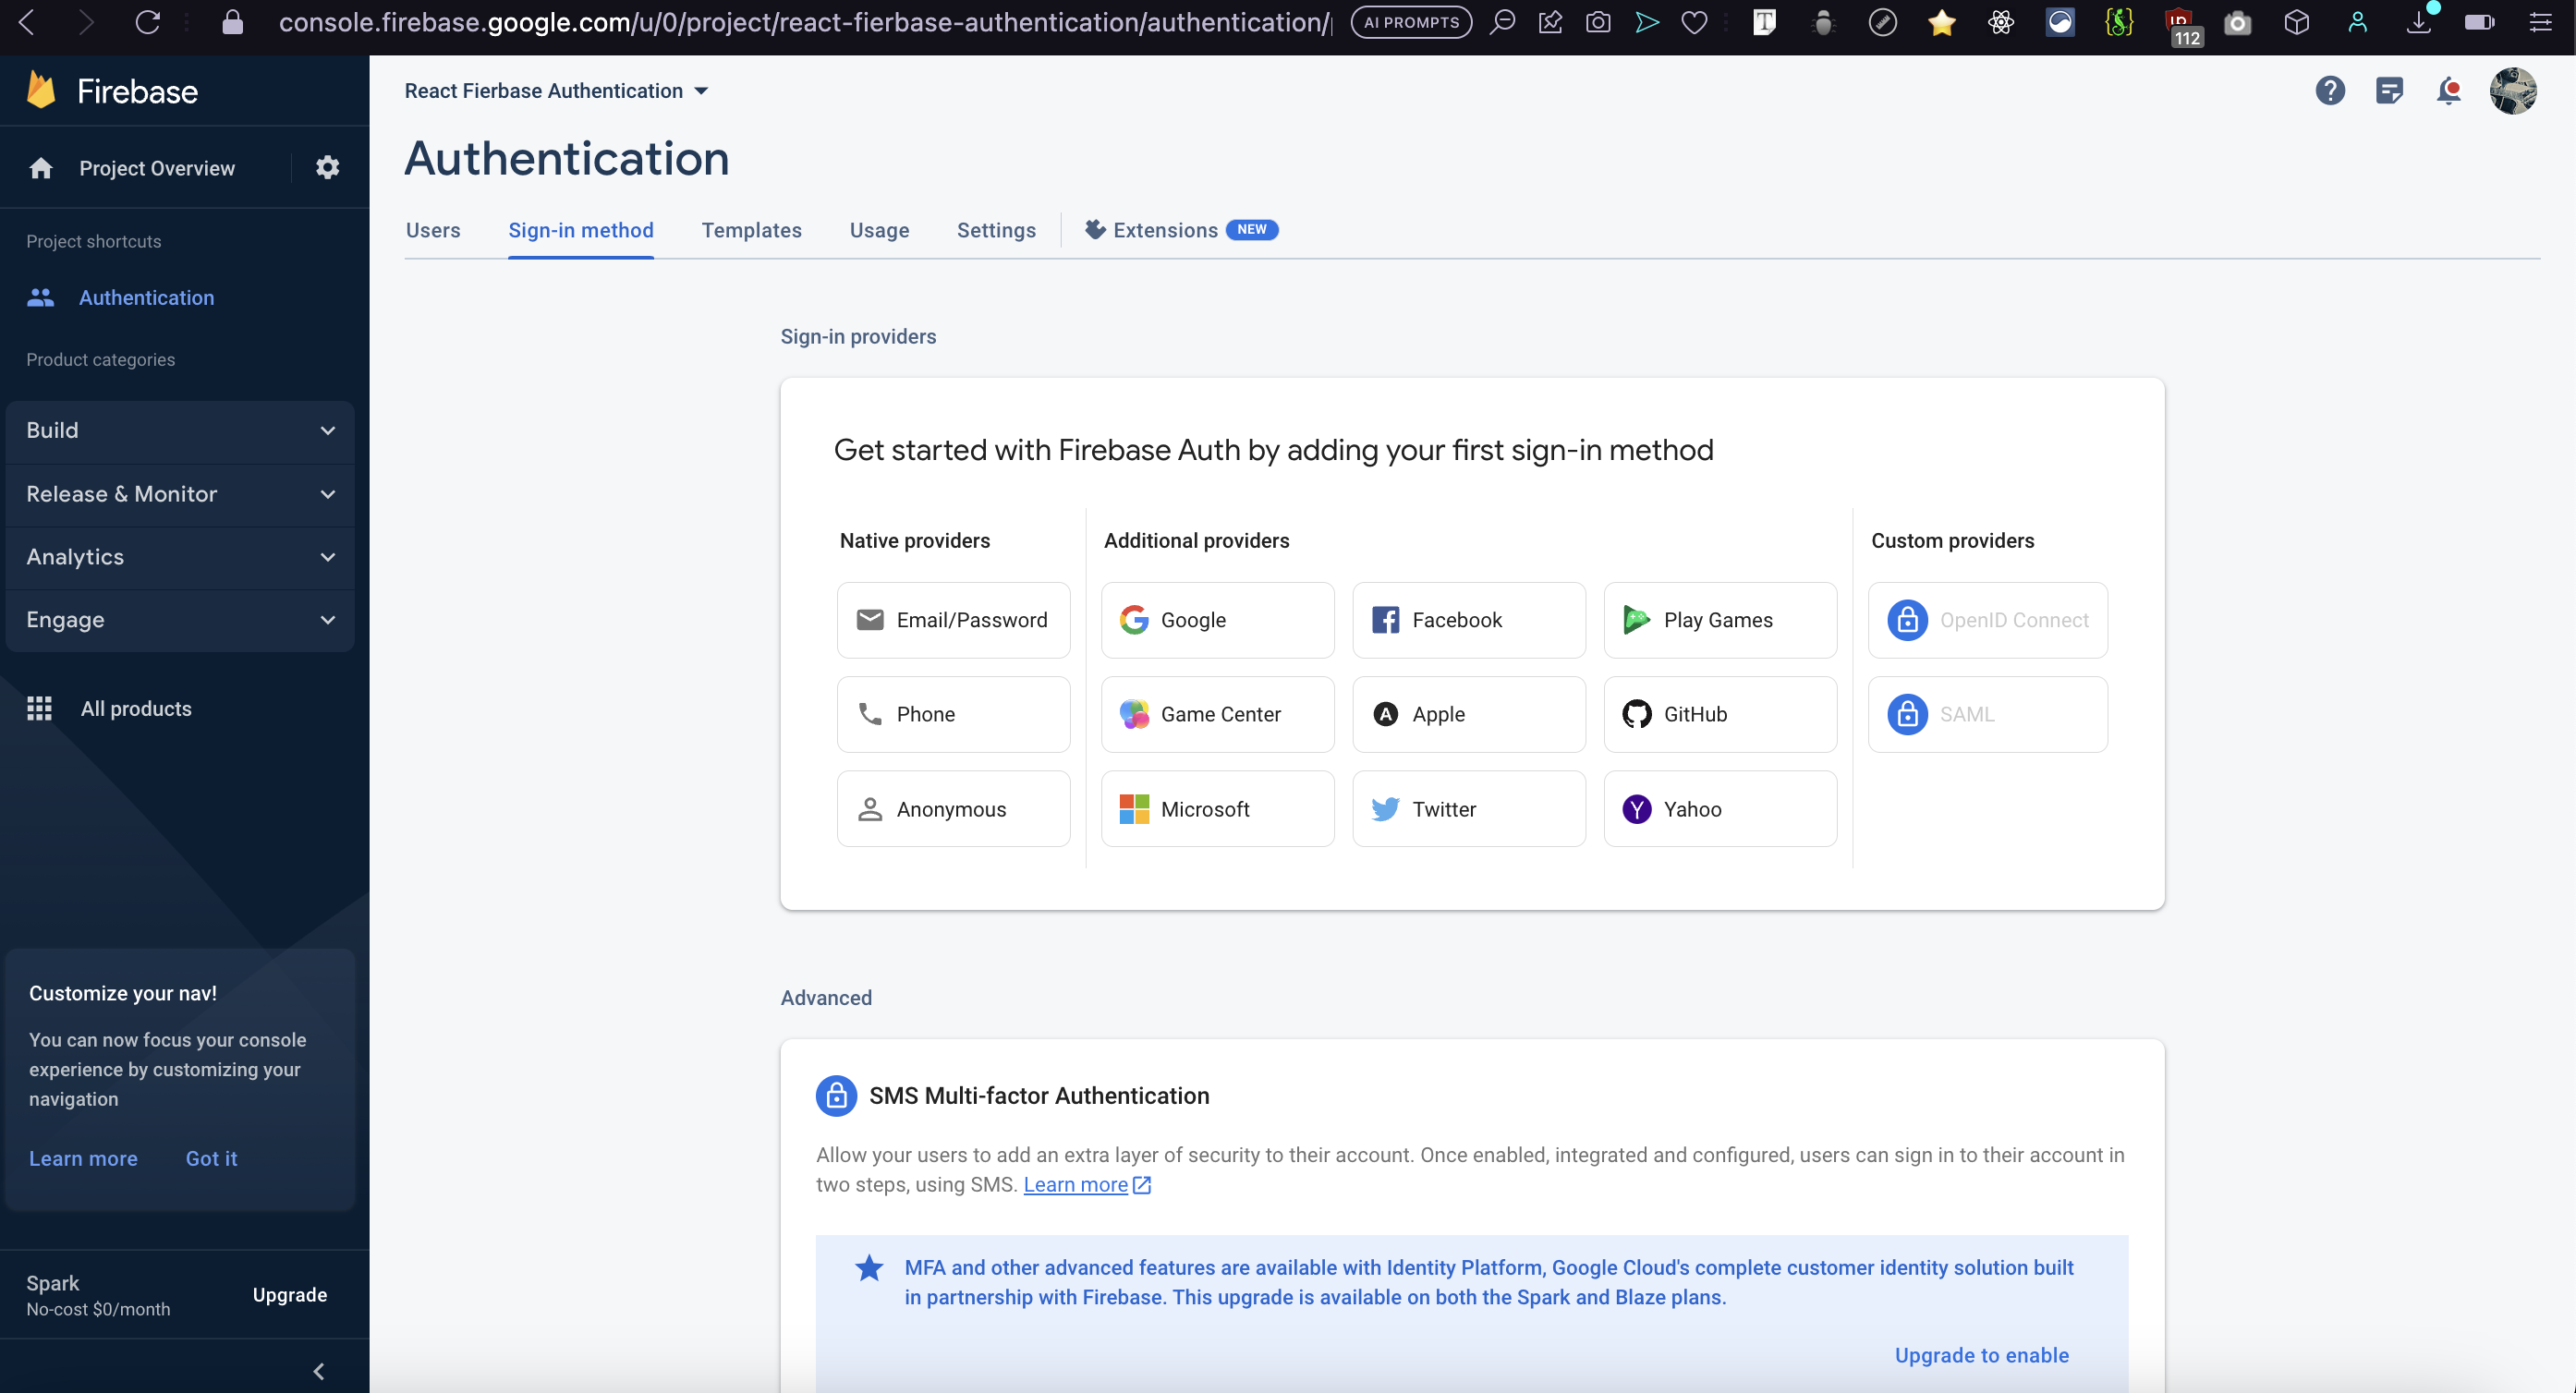
Once you have selected the "Email and Password" option, you will need to enable it for your project. Look for the "Email/Password" section and enable it by toggling the corresponding switch. This will allow users to sign in using their email and password credentials.
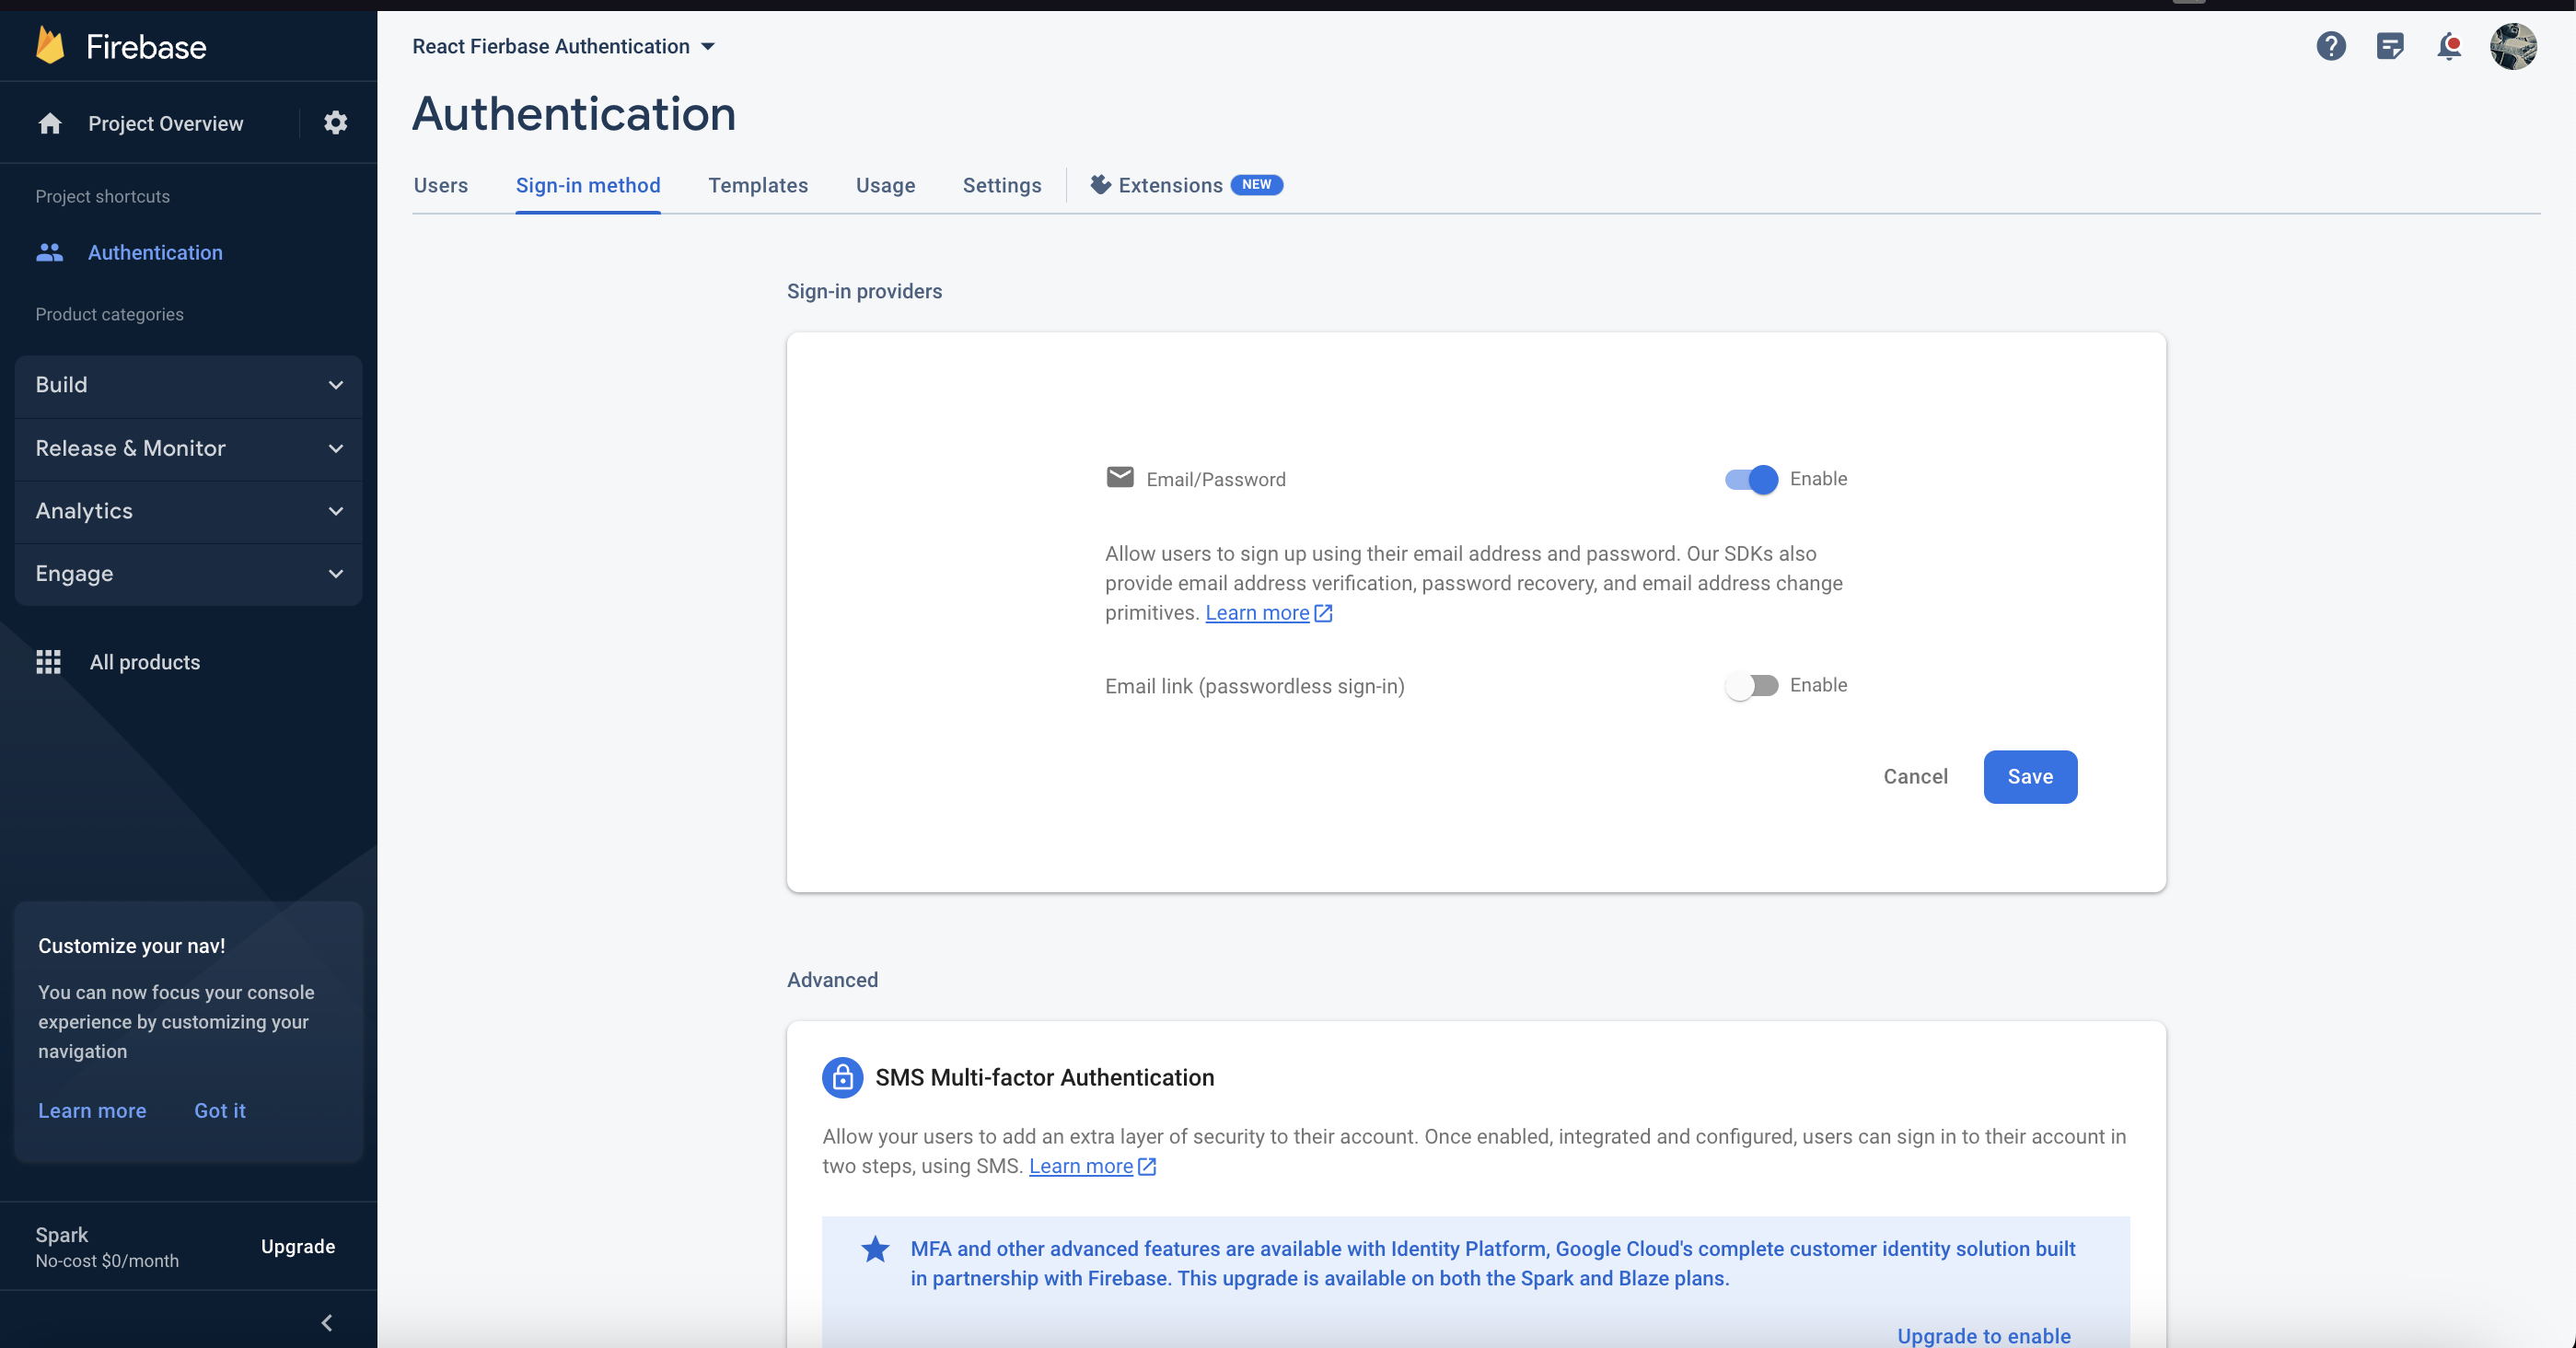
Lastly, after enabling the "Email/Password" option, remember to click on the "Save" button to save your changes. Congratulations! With this step, your Firebase project setup is now complete.
Firebase Firestore setup
Once you've set up your Firebase project and Authentication, it's time to enable Cloud Firestore for your project. Follow these steps:
- Click on the "Build" tab.
- and then click on the firestore and you will be redirected to this page
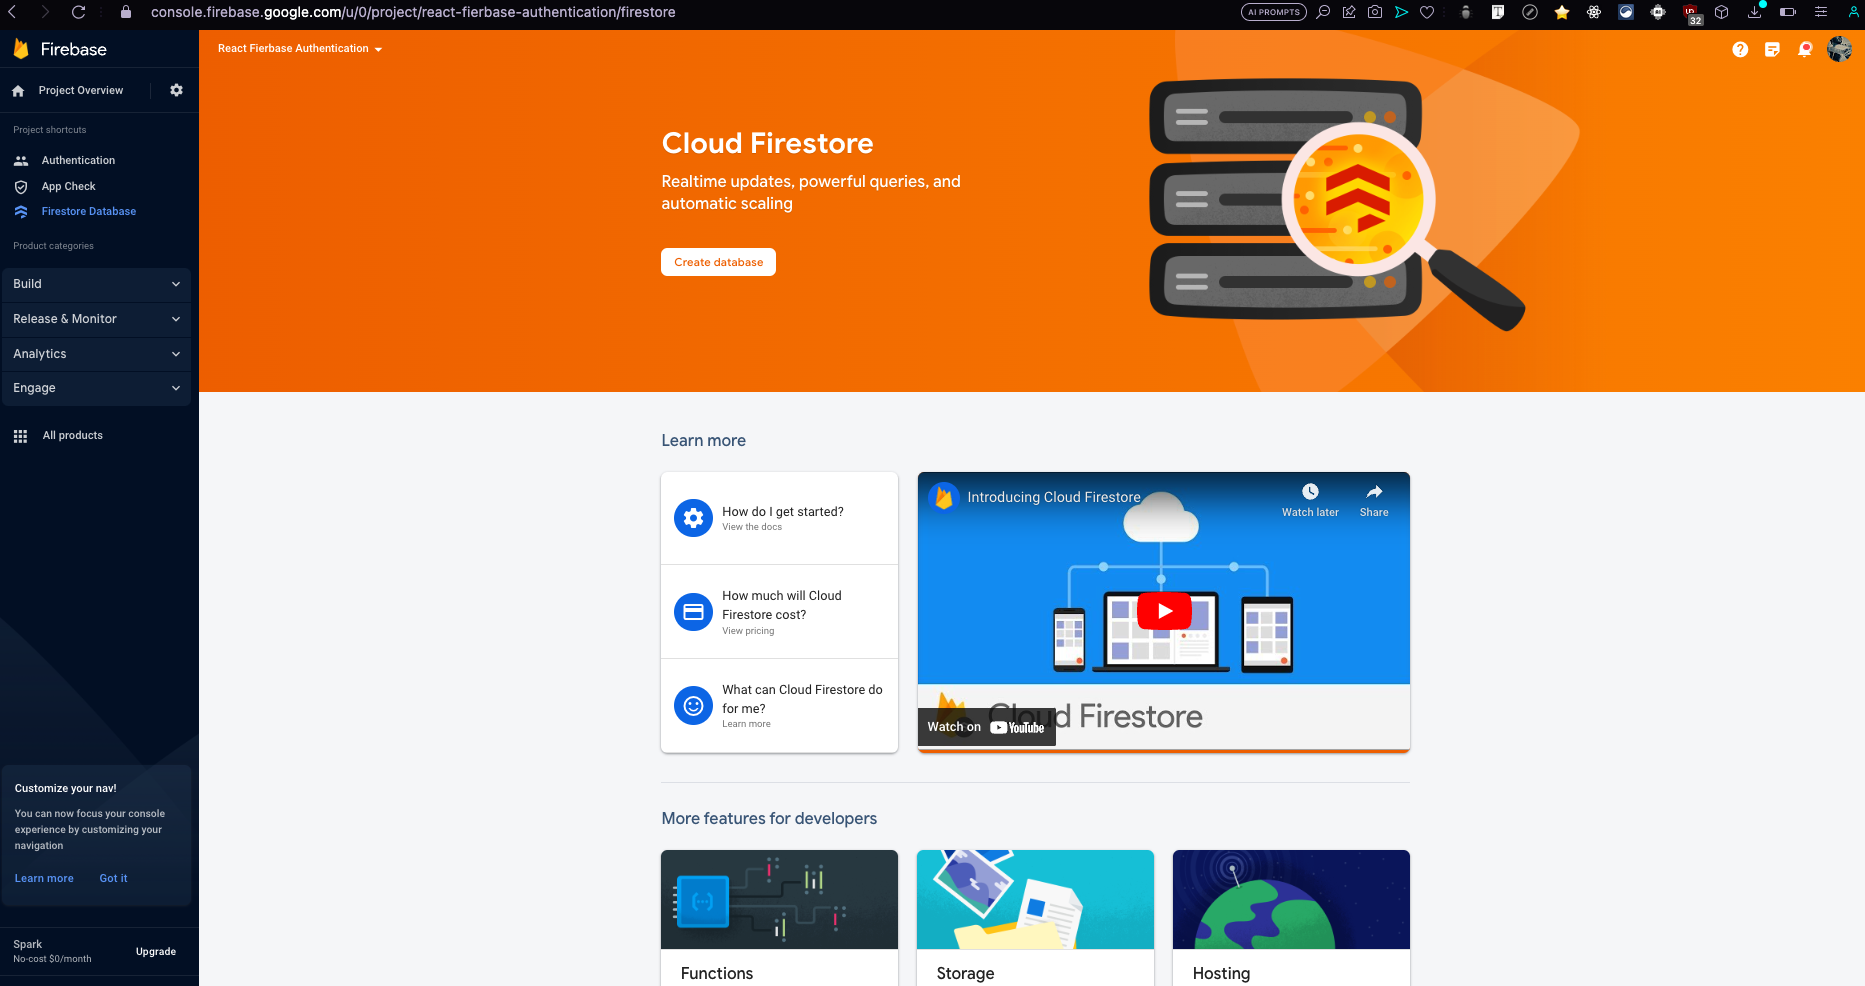
On this view click on the create database button to get started.
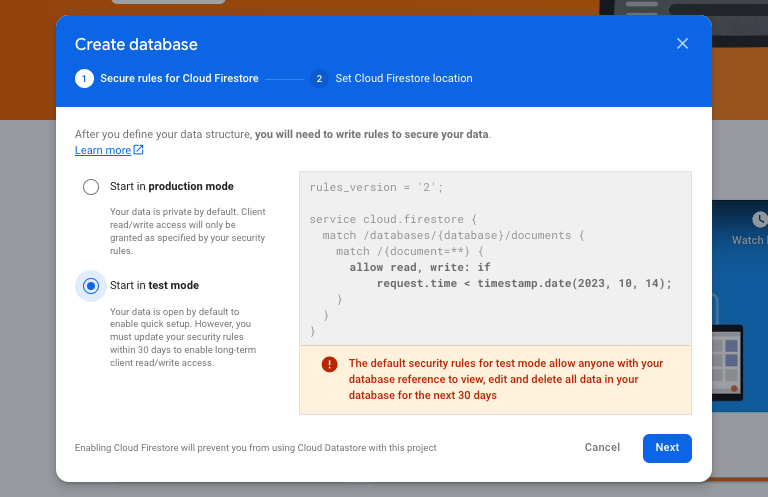
After clicking on the create database you will see this popup. Here we are creating the database in test mode but in a production app it should be in standard mode.
After selecting the mode click next.
On Clicking next you will see this. Here you need to select the location where you want to create your database.
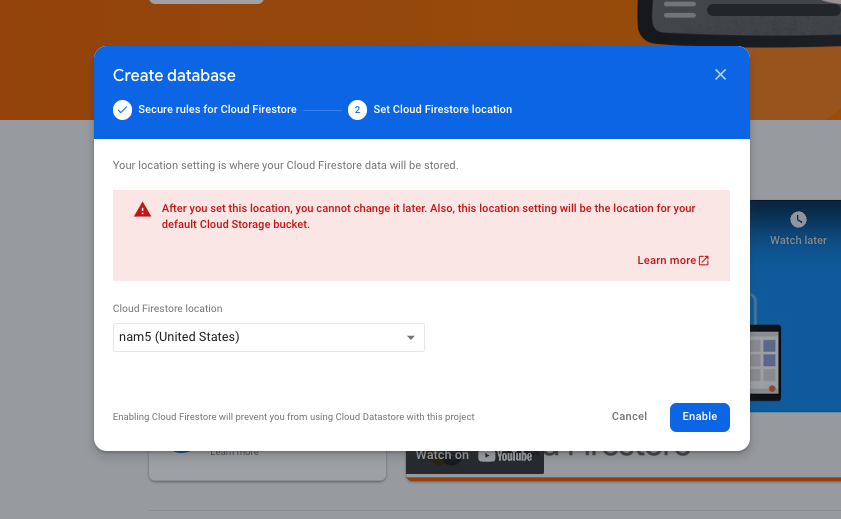
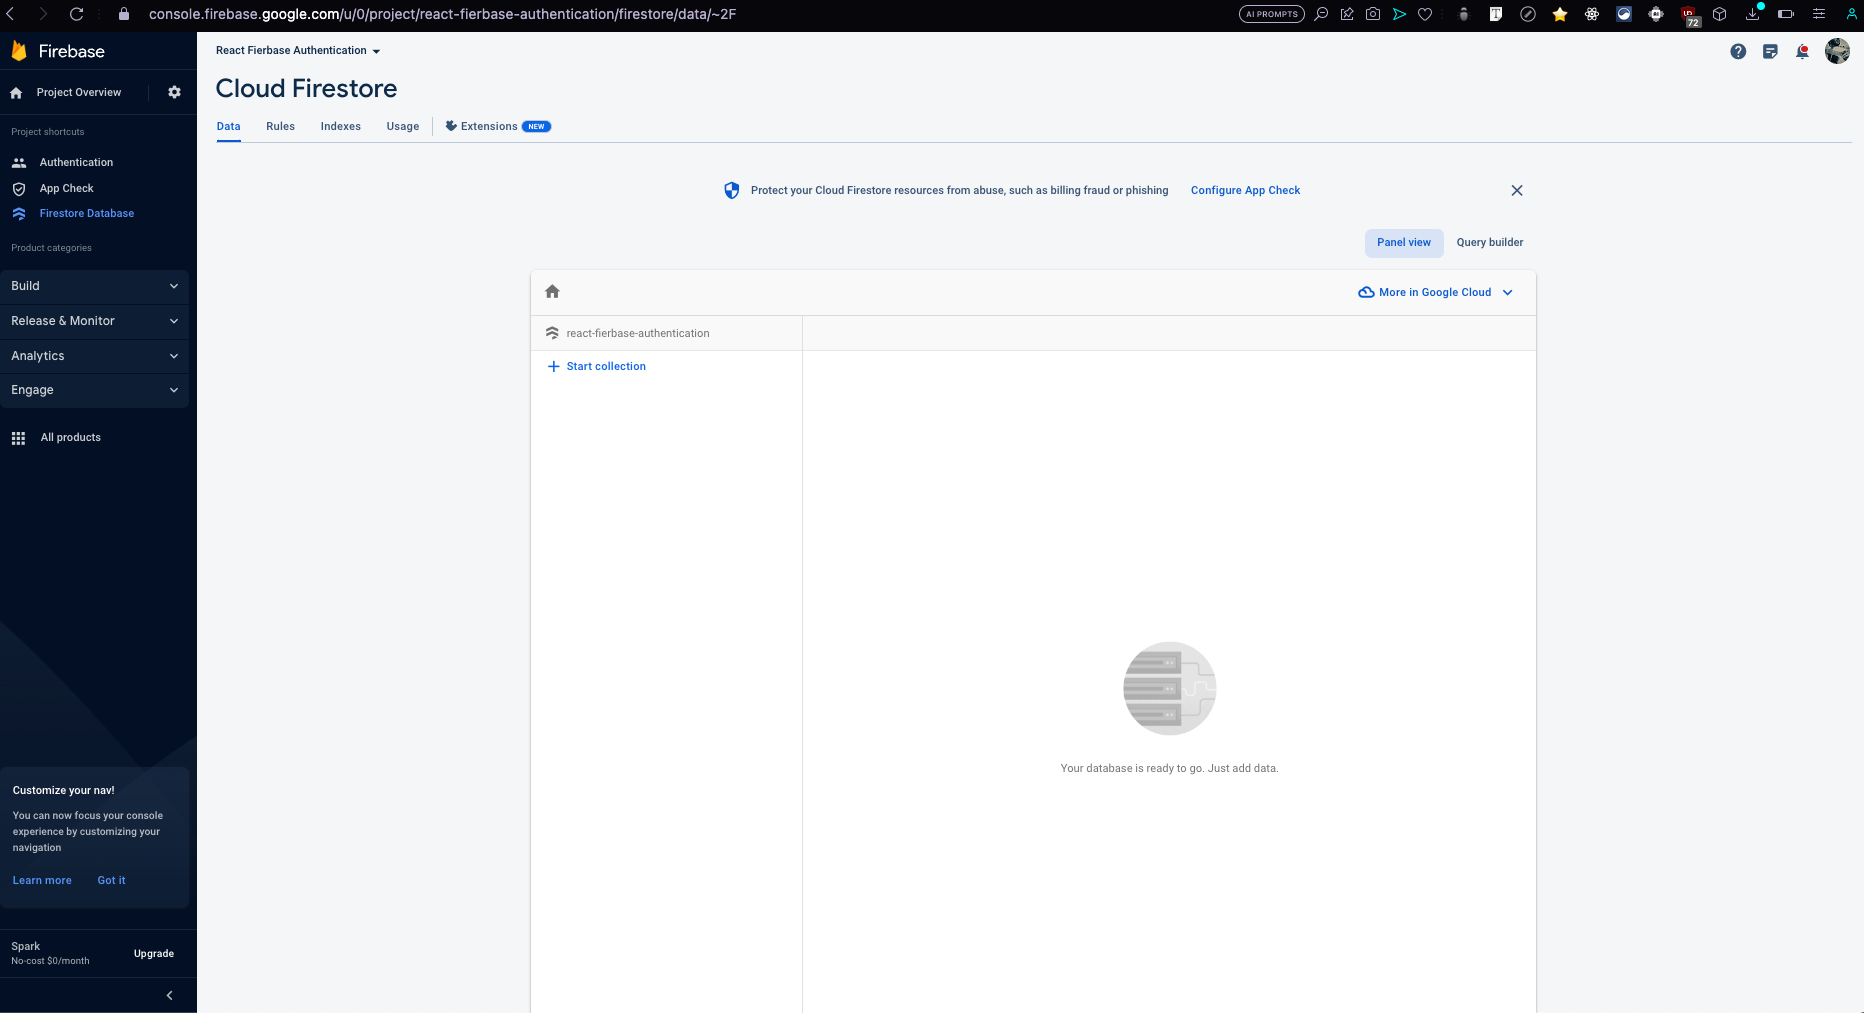
After enabling this you will see the empty collection view.
Here you need to click on start collection in order to make a new collection in firestore.
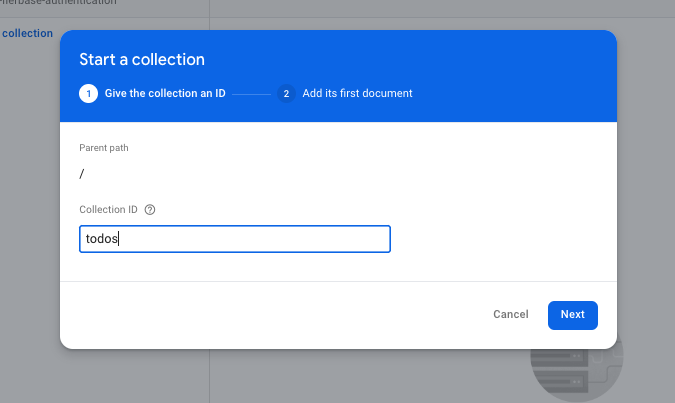
After clicking you will see this popup, you need to give your collection a name. We will name it as todos in this blog and then click next button.
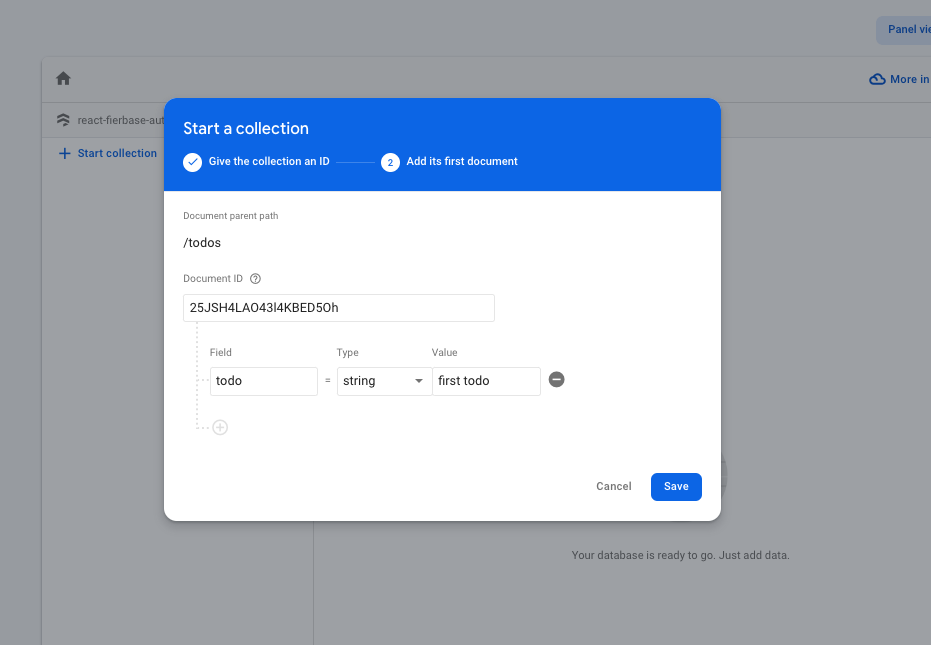
After clicking next you can create a document with custom id or autoID and then add a field inside the document called todo with a string value and click save.
After saving you will now have a collection called todos with a document inside the todos collection like this.

Congratulations! With this step, your Firebase project setup is now complete. Now we will start
React Firebase integration
Now that we have completed the setup of our React and Firebase projects, we can finally begin the integration process. Follow these steps:
- Navigate to the src folder of your React project.
- Create a file named firebase.js in that folder.
- Open the Firebase console and locate the project configuration for the web app we created earlier.
- Copy the project configuration details.
- Paste the project configuration details into the firebase.js file, replacing the existing placeholder configurations with your own.
import firebase from "firebase/app";
import "firebase/auth";
import "firebase/firestore";
import "firebase/database";
import "firebase/storage";
const firebaseConfig = {
apiKey: "AIzaSyCqT8ucm9UoP0jG9qofEAKiMiuKjmXlrsI",
authDomain: "react-fierbase-authentication.firebaseapp.com",
projectId: "react-fierbase-authentication",
storageBucket: "react-fierbase-authentication.appspot.com",
messagingSenderId: "452581564877",
appId: "1:452581564877:web:67e7f9a00522d5835f2484"
};
if (!firebase.apps.length) {
firebase.initializeApp(firebaseConfig);
} else {
firebase.app(); // if already initialized, use that one
}
export default firebase;
export const firebaseRef = firebase;
export const auth = firebase.auth;
export const firestore = firebase.firestore();
export const storageRef = firebase.storage().ref();
This will initialize and export the Firebase app with your configurations.
After completing the Firebase setup, create a folder named components within the src folder. This folder will hold the various components such as Home, Profile, Login, and Signup.
To begin, let's focus on creating the Signup component and implementing the signup logic using Firebase and React.
Explore More Tutorials
If you found this guide helpful and want to dive deeper into Firebase and React development, check out these additional tutorials on my website:
- How to Create a CRUD App with Firebase V9 and React - Learn how to build a complete CRUD (Create, Read, Update, Delete) application using Firebase V9 and React.
- How to Implement Firebase Authentication in Your React App for Seamless User Authentication - Discover the step-by-step process of integrating Firebase Authentication with public, protected and restricted routes into your React app for smooth user authentication.
These tutorials will expand your knowledge and help you become a proficient Firebase and React developer. Happy coding!